Create a record
After your data source is defined and tables from the data source are selected, you can create a new record.
Records represent the business-level facts, transactions, or changes in the data. Using records, you can specify and aggregate the necessary fields and data points of a specific business event drawn from one or more database tables. Records are then used to calculate metrics.
-
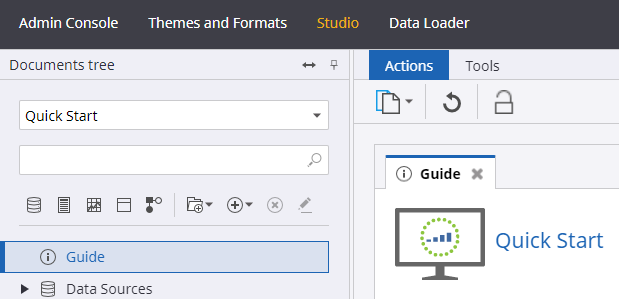
Navigate to the
Documents Tree and click
Guide.
-
On the
Guide screen, select
Add new record.

-
When prompted to enter a record name, type
Orders for the New Record Name and click
OK.

-
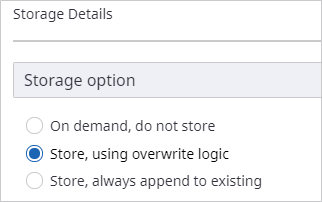
To store your data in
Insight
project database, change your record settings from
On-demand, do not store to
Store, using overwrite logic. At the top right
of the screen, click
Change.

The Storage Details dialog box appears. Select Store, using overwrite logic and click OK.
-
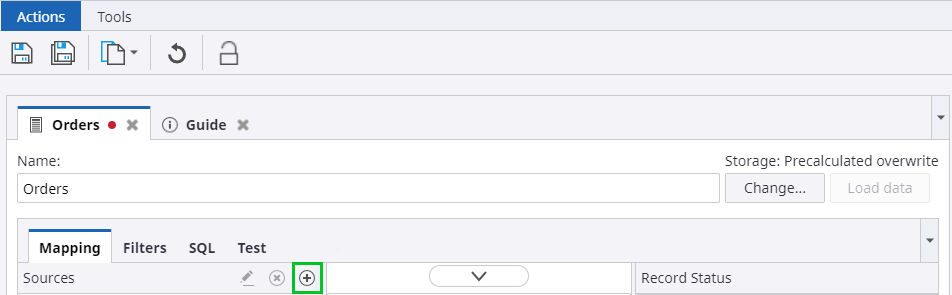
On the
Mapping tab in the
Sources section, click
 to add a new source table.
The Add Source dialog box appears. -
Within the
New source type section, select
DB table from, and in the drop-down menu,
select
Adventure Works.

-
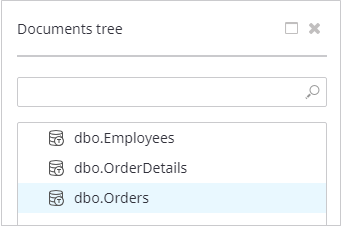
In the
Select new source dialog box, select the
ellipsis button.

A list of all the tables available for your data source appears. -
In the
Documents tree dialog box, select
dbo.Orders and click
OK.
Note You can start typing the name of the required table in the top search bar to help find specific tables in a long list. The system automatically lists matching names. -
Click
OK again to exit the
Add Source dialog box and go back to the
Mapping tab.
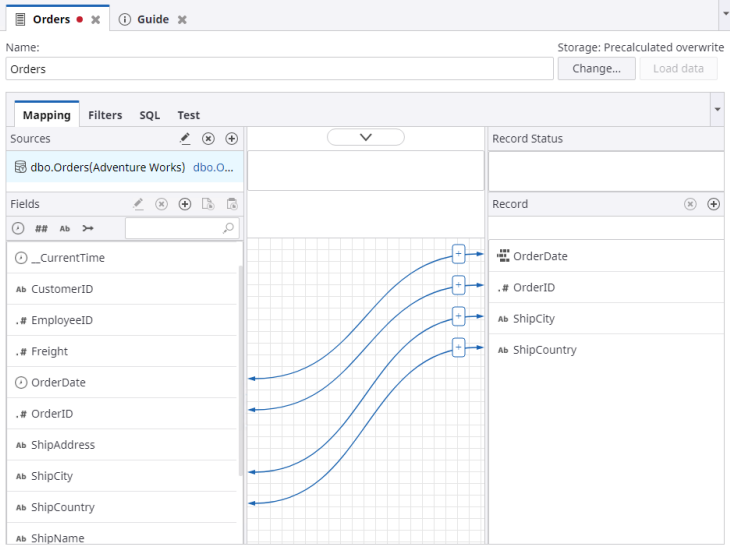
Now you are able to map data units to the records that you want to define. On the left, you can see all the fields available for the selected table. On the right, there is a space for defining the record.
- Start defining the record by clicking and dragging fields from the left section into the record section on the right. Choose fields that you might want to use later for various metrics. Drag the OrderDate into the record section.
-
When prompted to set the Time Filter on the
OrderDate field, click
Yes.

-
Drag the
OrderID now. Add as many records as needed to thoroughly
define and build your metrics. Also drag the
ShipCity and the
ShipCountry.
-
Save the record.
The following dialog box appears.

Click Apply to apply and save your database changes.