Example for Authorizing a Message and Inserting a Test Key
In the example below, user SM writes a message to be sent to recipient ARROWS. Authorized user SM1 first has to enter a test key into the message, and then authorized user SM2 has to sign the message.
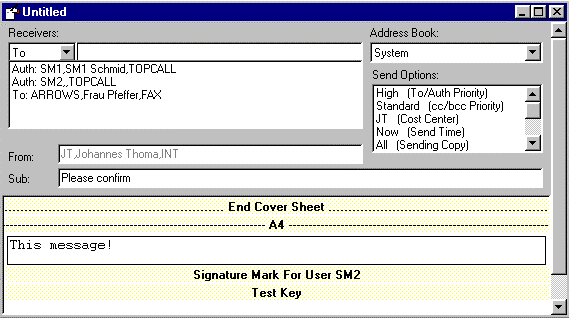
SM inserts a test key mark and a signature mark in the message. The test key mark will enable SM1 to insert the test key. The signature mark will enable SM2 to enter a signature. SM specifies the Auth delivery type and clicks Send.
This is the message before SM sends it to SM1 for authorization:
This is how the same message looks when SM1 receives it (the test key mark is replaced by a blue text box during sending):
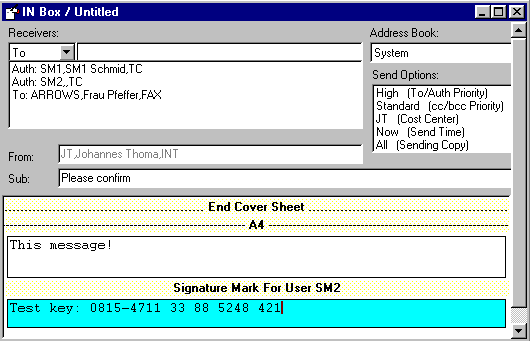
SM1 enters the test key and clicks the Authorize button. The message is then sent to SM2 for further authorization.
This is what the message looks like when SM2 receives it:
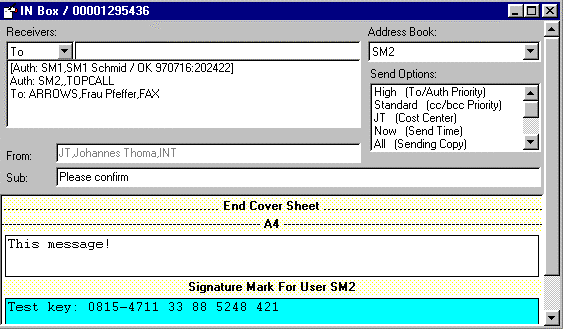
SM2 switches to Image Mode, where he proofreads and signs the message by clicking the Sign button. He then selects Authorize from the Message menu to send the message to its final recipient.
Users SM1 and SM2 must have the proper rights defined in their user profiles in order to insert test keys and sign messages. In addition, SM2 must have his signature stored in his user profile. (See the KCS Clients Administrator’s Manual for complete information on user profiles.)