Creating a field definition
Often the content of one or several fields on the document are used (together with process rules) to specify which path a document will take through a process. In order to help you formulate a process rule for this purpose, XBOUND has to know which fields are expected to be on the document. For this you create field definitions.
Field definitions always apply to a particular document type, so first you must create a document type. Document types indicate the functional category of a document and are valid for a particular process.
This procedure is needed if you want to enter field values in the dialog.
Tip: Field definitions for email import can be created automatically. See The dialog for details.
To create a field definition
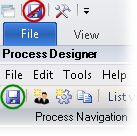
Using the XBOUND Management Center, open a console containing the Process Designer.
Under , click the desired process.
In the area, click :

Select the document type for which you want to create a field definition.
Click the button (
 ).
).In the new row that is displayed, specify the appropriate settings:
Type the name of the field.
Select the field type. The options are:
Text
Number
Floating Point Number
Date
Group (a combination of two or more fields, for example Address [group] with city and postal code)
Tip: Only text fields can be searched in the Process Monitor. If you need to be able to search in documents for the value of this field, select .
If the field has a default value, specify it here.
If the field has a minimum value, specify it here (applies to the type).*
If the field has a maximum value, specify it here (applies to the type).*
If the field has a minimum length, specify it here (applies to the type).*
If the field has a maximum length, specify it here (applies to the type).*
Select if this field is required.*
Select if this field is to be read-only.*
When this option is activated, field changes are saved. This makes it possible to trace changes to the field. You can see if the field was changed, and when (such as during Verification). This option must be activated in order to generate Capture Statistics and other reports.
Note: For this option to work, must also be selected in the dialog.
This option makes field data available for analysis in its own report. The field data is accessible using the "Report Field" label.
Note: The Agent for Reporting must also be configured.
The name used as label in reports.
*
 These settings are important when registering
documents in XBOUND. In the Register
Documents activity you can define fields that can or must be filled
in upon registration. Such values are checked using the and
options. If a field is read only, then a
must be selected on the tab of the Register Documents
activity.
These settings are important when registering
documents in XBOUND. In the Register
Documents activity you can define fields that can or must be filled
in upon registration. Such values are checked using the and
options. If a field is read only, then a
must be selected on the tab of the Register Documents
activity.Click the closed lock button (
 ).
).Save the process by clicking the button: