Using VRS with DOCUMENTS
FYI, the DOCUMENTS Installation Guide and SQC refer to this topic by name, so don't change it without updating those documents.
Virtual ReScan (VRS) is an image enhancement tool. VRS can be used with DOCUMENTS to improve the image quality of scanned documents. You can use VRS with its default settings, allow it to automatically enhance images, or use it to make manual enhancements. The DOCUMENTS Installation Guide describes how to install and set up VRS.
When scanning with VRS, the scanning specifications in DOCUMENTS have a property for each of the VRS configuration files:
-
kfxscsi.ini
-
kfxisis_source name>.ini
These properties contain the entire content of the files.
To use VRS with DOCUMENTS, create a VRS scanning specification
-
On the of the Administration module, select > .
-
Double-click the appropriate scanner to open the specification, and select .
-
Click and type a name for the new scanning specification (max. 80 characters).
The new specification is based on the settings in the default scanning specification selected for the scanner in the settings.
-
Optional: Select the scanning specification you just created and click . You can specify the , ,
values, including , are defined by the selected VRS profile. Therefore, these settings are disabled when VRS is used.
All other scanner settings are only available if the corresponding features are available on the scanner. If, as in this example, and features do not exist for the selected scanner, the settings are not available in the scanning specification.
-
Optional: Select > to view or adjust the VRS profile used by the scanning specification.
-
Optional: To apply any additional advanced settings, select > .
You can also select > if there are any advanced features particular to this type of scanner.
-
When the scanning specification property dialog is opened, VRS is loaded in the background. A VRS icon is displayed in the task bar:

To open the advanced Virtual Rescan Interactive Viewer, right-click the VRS icon and on the task bar and select .
Here you can enable the VRS features required for your solutions. For example, on the tab you can enable , , and .
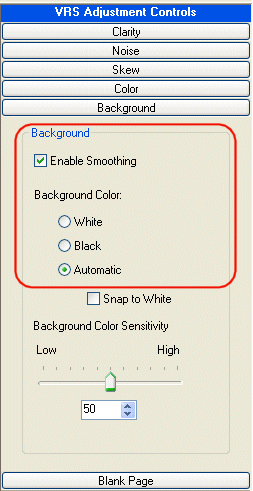
In the VRS Professional version, you can change the background color to black or white on the tab. This is useful, for example, for removing colored backgrounds from the images you are processing.

-
If you need to enable other features in your VRS profile, such as auto cropping for example, you also need to change the > Scanner Driver Settings. The settings available depend on the features available in the scanner.
-
When you are finished, select > to save your VRS profile. Otherwise, your changes will be lost.
-
Return to the Administration module, and click to save your settings and close the dialog.
-
Reopen the settings.
-
Select > . To load the newly changed scanner driver settings, select a from the list and click .
Important Each time a scanning specification is accessed or used from the Administration or Production modules, any corresponding VRS profile is copied from the database to the workstation. Any unsaved changes to the VRS configuration files on the workstation are overwritten with the content of the files from the database. If you test or fine-tune a VRS profile and want to save your settings, it is therefore important to in order to load these settings to the database.
-
Finally, save your VRS scanner settings in the Administration module by clicking .
You are now ready to select the scanning specification in a production task.
Creating a scanning specification
Deleting a scanning specification