Capture with iPhone and iPad
Capture is intended for text-based documents and the output is delivered in black and white.
Use the camera to capture
- On your iPhone or iPad, open the Printix App.
-
Select
Menu
 >
Capture.
-
Alternatively, you can select Capture
 on the
Print page.
-
-
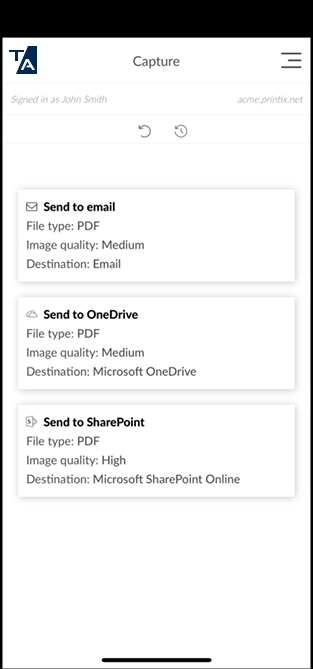
Select a box with the appropriate settings.
Example:
-
File type: PDF
-
Image quality: Medium
-
Destination: Email
-
-
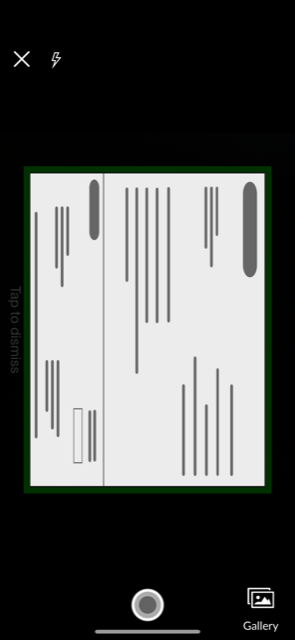
Follow the instructions, then take a photo.
-
If you do not want to proceed, select X to cancel and return to the list of boxes.
-
The built-in, automatic crop function works best if the document is placed on a darker background.
-
Select the lightning icon to toggle the flashlight.
-
If prompted, select Allow to allow the Printix App to take pictures.

-
- Preview the photo. Optionally, select Retake, or select Edit to Crop or Rotate the image.
-
Select
Use.
If you did not crop the image, it is cropped automatically. If you are not satisfied with the automatic cropping, select the photo, select Delete, then retake it, but this time, crop the image manually by selecting Edit and Crop.
- Optionally, select a photo and select Delete to delete it. Select Add to add another photo. Select Close when done.
- Select Send.
Capture existing photos
- On your iPhone or iPad, open the Printix App.
-
Select
Menu
 >
Capture.
-
Alternatively, you can select Capture
 on the
Print page.
-
-
Select a box with the appropriate settings.
Example:
-
File type: PDF
-
Image quality: Medium
-
Destination: Email
-
- Select Gallery.
-
Select the photo.
-
If you do not want to proceed, select X to cancel and return to the list of boxes.
-
- Preview the photo. Optionally, select Edit to Crop or Rotate the image.
-
Select
Use.
If you did not crop the image, it is cropped automatically. If you are not satisfied with the automatic cropping, select the photo, select Delete, then select it again in the Gallery, but this time, crop the image manually by selecting Edit and Crop.
- Optionally, select a photo and select Delete to delete it. Select Add to add another photo. Select Close when done.
- Select Send.

