Uninstall the Printix Client
Follow these instructions to uninstall the Printix Client from Windows and Mac computers.
If you uninstall the Printix Client, your Printix printers are converted to standard network printers.
The printer IDs are removed from the printer names. Your administrator may have configured printer IDs to not be visible to users.
Example: Reception ASD changes to Reception.
Windows
- Open the Control Panel and select Programs and Features.
-
Select
Printix Client and select
Uninstall.
If Printix Client was installed with Windows Installer (MSI), select the Printix Client without Printix logo (smallest size).
-
You are prompted to confirm the uninstallation. Select
Yes.
The uninstallation is complete.
-
Select
OK.
Alternatively, you can run unins000.exe in the Printix Client installation folder.
If your organization has used, for example, Microsoft Endpoint Manager to deploy Printix Client as a required application, then Printix Client will be installed again.
Mac
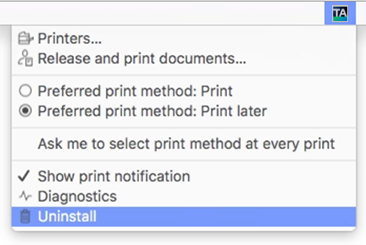
- Open the Printix Client menu.
- Press the Option key to toggle Sign in to Uninstall.
-
Select
Uninstall.
If the uninstallation fails, it could be because you are not signed in. Select Sign in and then select Uninstall again. Alternatively, you can run the script:
sh /Users/Shared/.Printix.net/Service/uninstallMac.shOn macOS 10.15 or older, you should use:
sudo /Users/Shared/.Printix.net/Service/uninstallMac.sh

