Set the default printer
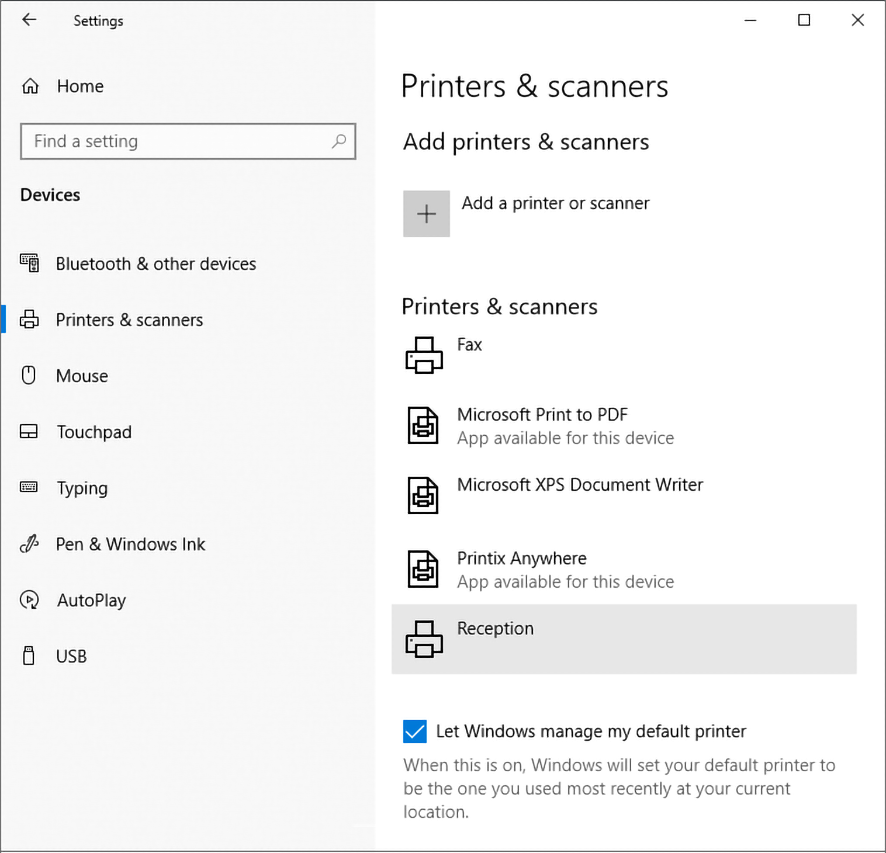
By default, Windows manages the default printer. To turn off this behavior:
-
Press
Windows+I.
The Settings window appears.
- Select Devices (or Bluetooth & devices on Windows 11).
- Select Printers & scanners.
- Turn off Let Windows manage my default printer at the bottom of the page.
Set default printer on Windows
-
Press
Windows+I.
The Settings window appears.
- Select Devices (or Bluetooth & devices on Windows 11).
- Select Printers & scanners.
-
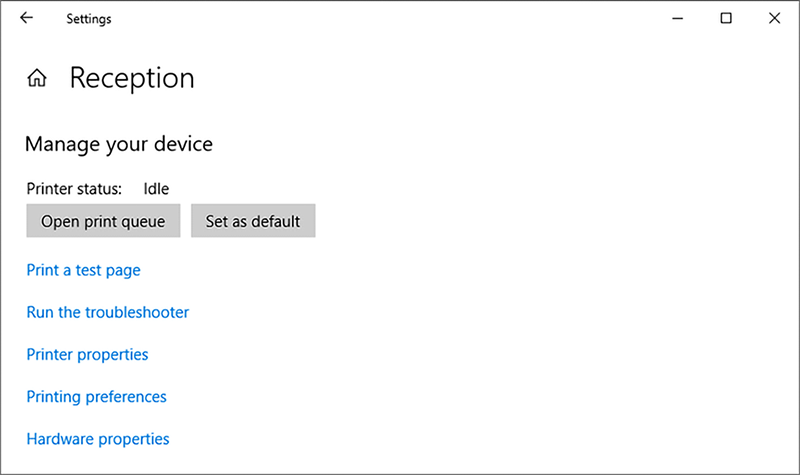
Select the printer and select
Manage.
On Windows 11, you only need to select the printer.
- Select Set as default.
Alternatively, set default printer using the Control Panel
This method is not available on Windows 11.
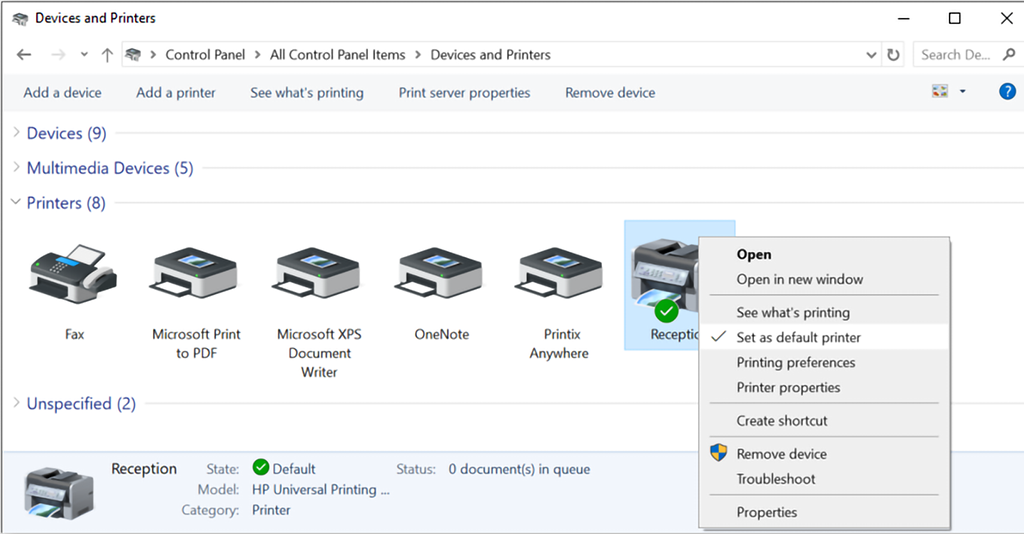
- Open the Control Panel and select Devices and Printers.
- Right-click a printer and select Set as default printer.
Set default printer on a Mac
-
In the Apple menu, select
.
On macOS 12 or lower versions, select System Preferences instead of System Settings.
-
Select the menu labeled
Default printer and select the preferred printer.
If you select Last printer used, the computer remembers the last printer you used at your current network location.


