Data load
A data warehouse (Data DB) is a system used for reporting and data analysis and is considered a core component of business intelligence. Data DB is a central repository of integrated data from one or more sources. It consolidates current and historical data in a single place and is used for creating analytical reports.
The typical Extract, Transform, Load (ETL) data warehouse uses staging, data integration, and access layers to house its key functions. In Insight, this schema is integrated on the records and metrics level: they may store their data in the Data DB.
The data stored in the Data DB is uploaded from the operational systems. The data may pass through an operational data store and may require data cleansing for additional operations to ensure data quality before it is used in the Data DB for reporting. In Insight, these requirements are implemented via the data load engine based on the execution plans.
The data from the external sources is copied to the Data DB. Later, Insight uses this data for creating reports rather than sending constant requests to the transaction database. In this case, no additional load is enforced on the system and thus the resources are used sparingly. Also it can be useful for reports since the data can be pre-processed and the metrics aggregated.
The data in the Data DB can be refreshed in two variants.
- Full data renewal: All old data is completely erased and then replaced by the new data. This process happens according to certain time cycles and that is why the data in the Data DB may lag behind the actual data in the external system. We recommend this method when the volume of data is not significant and the update interval is not frequent: for example, once a day outside of business hours when the external data is not being updated.
- Incremental data renewal: The system re-loads only the data that has changed.
In the previous exercise procedures, the data was used directly from the external source systems: all records and metrics had the "on-demand" type of storage. In this sample procedure you will learn how to configure the data load and benefit from the Data DB (data warehouse).
Prepare the metric for a data load
In a previous exercise, you created the Order Pool metric. In the procedure below, we need to execute the data load for this metric.
- In Studio, on the Documents Tree, find the Order Pool metric under Metrics. Copy this metric, change the name to Order Pool Stored, and open it.
- Click Change in the Storage section. Select Store, using overwrite logic.
- In the Time options section, select up to what time the metric will be pre-aggregated. For example, by default it is set to 1 day and that means all data for 1 day with the same set of the rest dimensions are aggregated into one line. The minimal data interval for reports in this case is 1 day. If the user breaks the report down by months, the data will be aggregated accordingly.
- Click OK.
-
Save
 the metric. When prompted
in the next pop-up window, click
Apply.
the metric. When prompted
in the next pop-up window, click
Apply.
Create an execution plan
An execution plan is an Insight document that describes which data to load, and when. It manages the periodic updates of data in the Data DB from external systems.
To download data for the metric, create an execution plan with two steps. For the first step, the on-demand record will be created and since it has no existing table in the Data DB, all the data will be loaded to the temporary table on the SQL server. As a second step, the data for the metric will be loaded and can be processed because the required data is already on the server. After the data load is complete, the temporary table for the record is deleted.
- In Studio on the Documents Tree, right-click Execution Plans, select New Execution Plan, name it, and click OK.
-
Click the plus sign and select
Add Record group.

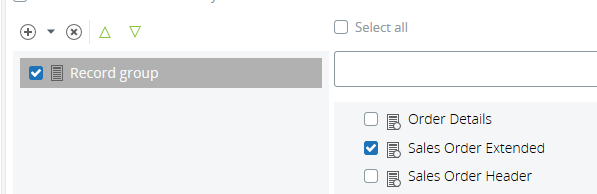
-
Select the
Sales Order Extended
record, which is the source for the metric.
- Add a second step to the plan: click the plus sign and select Add Metric group.
- Select the Order Pool Stored metric.
-
Save
the execution plan.
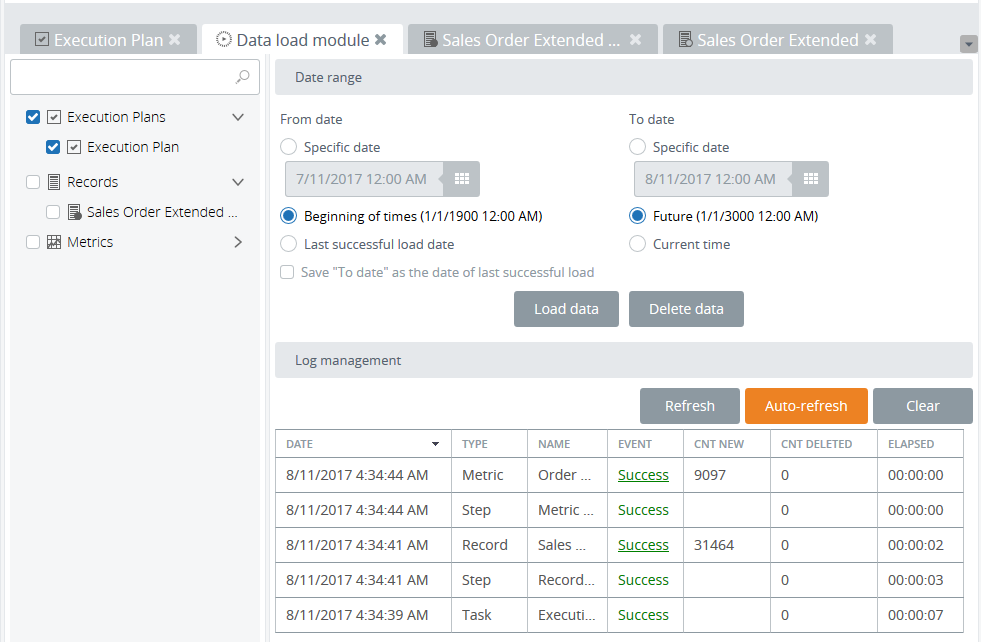
- Click Data Load to proceed to the Data Load module. By default, the correct document (Execution plan) is already selected. Select the time interval: Beginning of times (1/1/1900 12:00 AM) and Future (1/1/3000 12:00 AM).
-
Click
Load data and wait
until the process is complete.
Use data from multiple sources
The procedure described above is valid for the simple cases with only one data source. However, very often it is necessary to join or merge data from different sources. In this case, the best practice would be to download raw data from several external sources into the Data DB and later use it for processing metrics, modification and combination of data. To apply this approach:
- On the Documents Tree, find the Sales Order Extended record, copy it, and rename it to Sales Order Extended Stored.
- Open the record and change the storage type to Store, using overwrite logic by clicking the Change button. Click OK.
-
Save
the record.
-
Change the source record for the
Order Pool Stored
metric.
- Find the metric on the Documents Tree.
-
Right-click the record name and select
Replace
source.
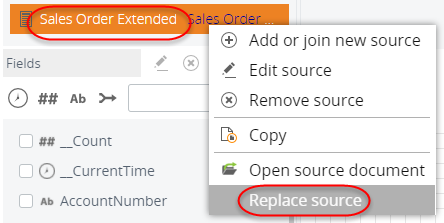
- Select Sales Order Extended Stored and click OK.
-
Save
the metric.
-
Now you need to download data for the record and for the metric.
As an option, it is possible to execute it via the execution plan as described
in the procedure above. As another option, you can download the data from
multiple sources separately. Load the data for the record.
- Click Load data.
- On the left, select the Sales Order Extended Stored record.
- Select Beginning of times (1/1/1900 12:00 AM) and Future (1/1/3000 12:00 AM).
- Click Load data and wait until the process is complete.
-
Load data for the metric.
- In the same data load module, select the Order Pool Stored metric.
- Select Beginning of times (1/1/1900 12:00 AM) and Future (1/1/3000 12:00 AM).
- Click Load data and wait until the process completes.
After completing this exercise, you are now able to configure the data load, create an execution plan, and load data from multiple sources.