Translation tables
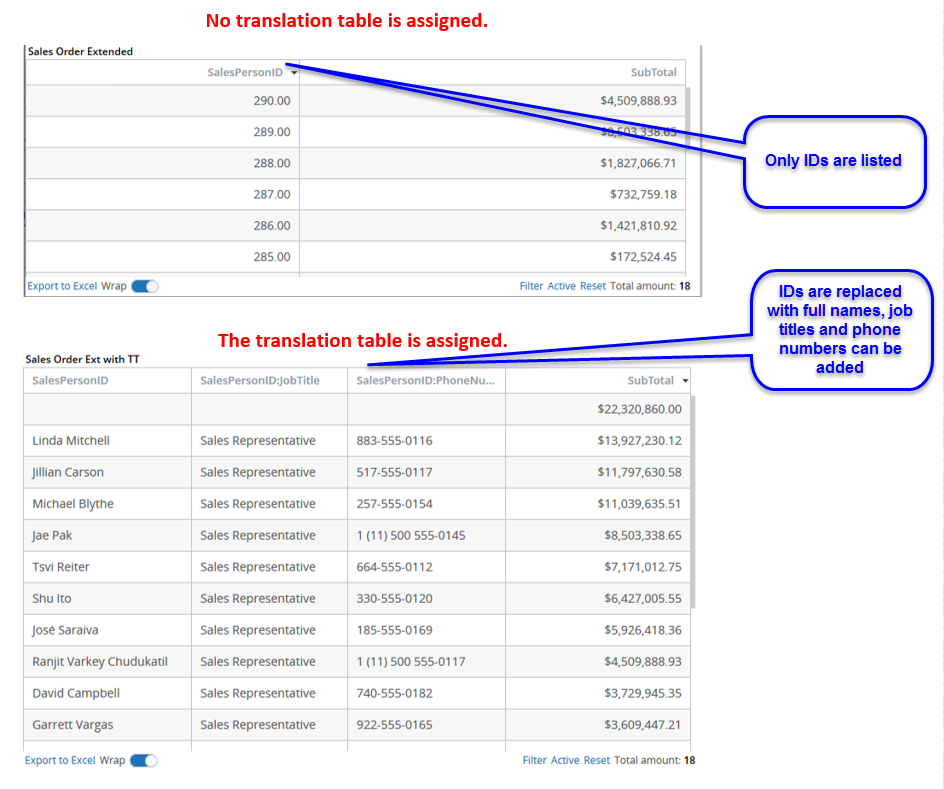
Translation tables in Insight are the dimension tables that are used to separate dimension details from the main data table. Typically, a data table contains a dimension identifier (for example, Employee ID) while the translation table contains the remaining details for the dimension (Name, Address, Phone number, and more).
By default, a translation table in Insight has only one attribute - Name. The value for this attribute shows in all places where the user wants to see this dimension. Also, you can add other dimension attributes to the metric or record grid.
Create a translation table
The
Sales Order Extended
record has several fields that have IDs and not names. For example, consider
the SalesPersonID field. With this field, you can create a record grid that
shows sales results for each salesperson and also their personal details.
- In Studio, on the Documents Tree, right-click Translation Tables and select New Translation Table. Name it Sales Person, select Dynamic, and click OK.
- In the Sources section, click the plus sign to add a table.
- On the Add Source screen, in the Select new source section, click the ellipsis icon and select dbo.vSalesPerson. Click OK and then OK again to close the wizard.
- Map BusinessEntityID to Item Id.
-
Since First name and Last name are two different fields, you
need to merge them by creating a derived field.
- In the Fields section, click the plus sign.
- Name the field Full Name.
-
Create an expression as shown in the sample screen
below.
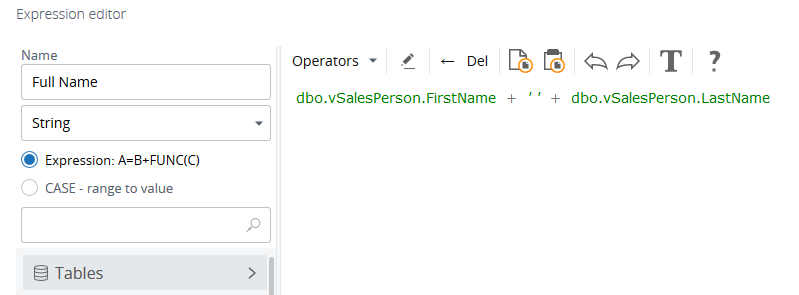
- Click OK.
- Map Full Name to Name.
- Map JobTitle and PhoneNumber.
-
Save
 the translation table.
Upload data to the Data DB
You need to upload data for the translation table into the Data DB.
- In Studio, in the translation editor, click Load data.
-
In the Data Load module, click
Load data and wait
until the process completes.

Prepare the record
- Copy the Sales Order Extended record and name it Sales Order Ext wtih TT.
- Link the SalesPersonID field with the translation table. In the Property Panel, find Translation Table and select Sales Person.
-
Save
the record.
Create a View
- In Studio, create a new View and name it Sales with TT.
- Add a record grid to the canvas.
-
Configure the wizard.
- On the Data tab, click the ellipsis icon and add the Order Sales Ext TT record as the source.
- Click Remove all to remove all the fields.
-
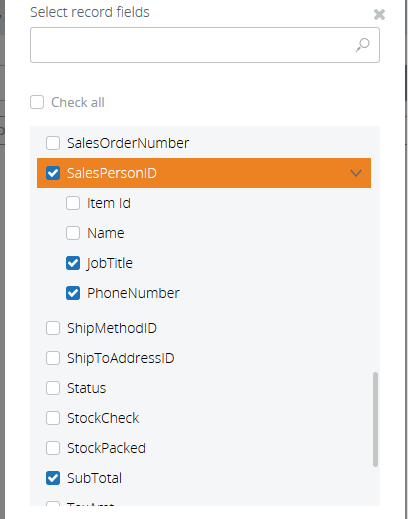
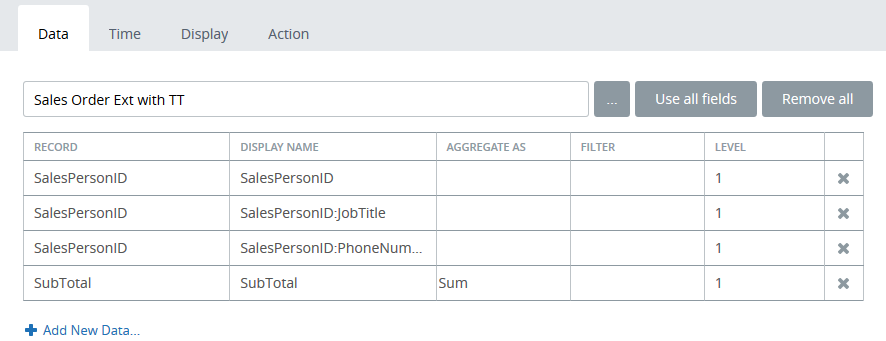
Add only the necessary fields. Click
Add New Data and
select only the fields shown in the screen shot.
-
Change the order, assign aggregation and levels as shown
below. Remove the
Display all records on the
latest level selection.
- On the Time tab, select Fixed time window from 1/1/1900 12:00 AM to 1/1/3000 12:00 AM.
-
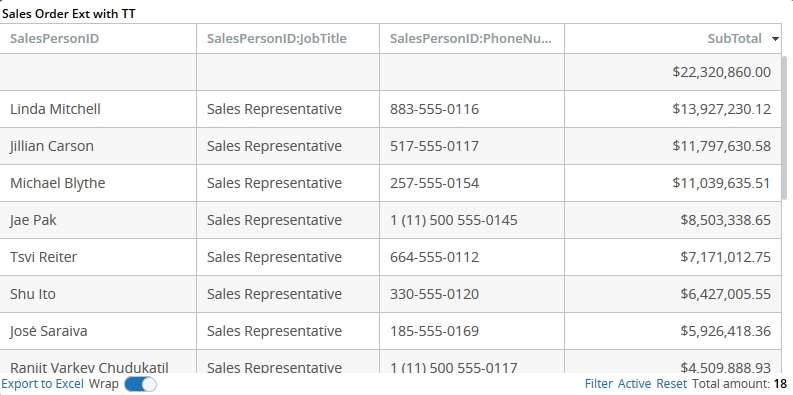
Open the View in the Preview/Viewer. Now the grid shows Names
instead of IDs.