Reports
The reporting system in Insight generates PDF files that can convey different information. It can be achieved in the following ways:
-
From the Viewer, by triggering an action:
- Print current View/dashboard.
- Print saved report.
-
According to the predefined schedule:
- Save files to the local disc.
- Send saved reports by email.
Configure printing current View/dashboard
The easiest task that you can perform with your dashboard is to print to PDF what you currently see on the dashboard. To complete this task, you need to extend the existing menu with new items that will trigger required actions.
- Print Current View: this action, triggered from the menu or from the View with the View holder component, prints only the View within the View holder without the header.
- Print Dashboard: this action always prints the whole View with the header and View holder.
- In Studio, find the Main View, copy it, and rename it to Main with Print.
-
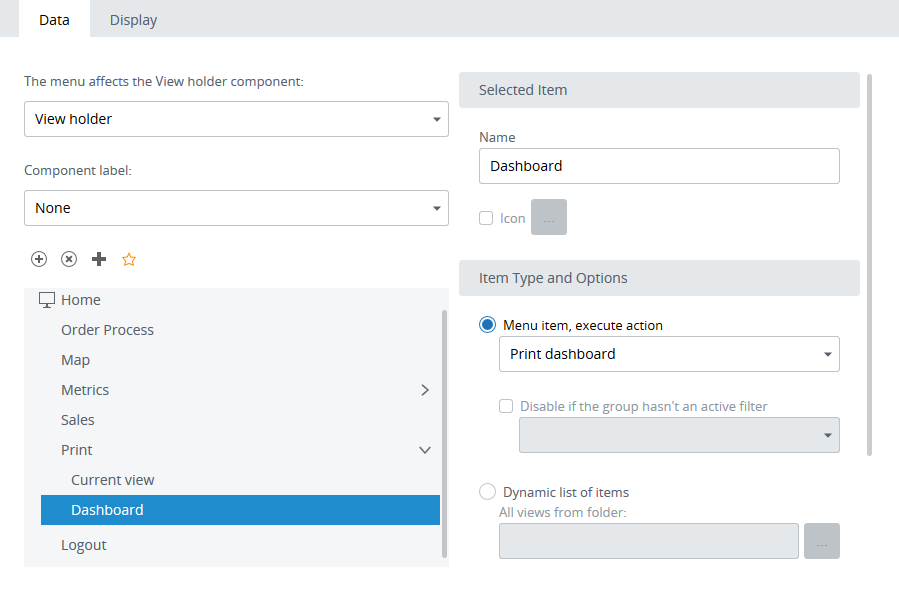
Highlight the menu component and open the data wizard.
-
Add new menu items.
- Click the Add peer icon.
- Rename New item to Print.
- Move Print up and place it after Sales.
-
With
Print in focus,
click
Add child, and add
Current View.
Select the
Print current view
action. In the same way, add
Dashboard and set
it to
Print
dashboard.
-
Click
OK and save
 the View.
Trigger printing current View/dashboard
- Open the Main with Print View in the Preview/Viewer.
-
In the Menu, select
.
The Charts View opens in the View holder.
-
In the Menu, select
.
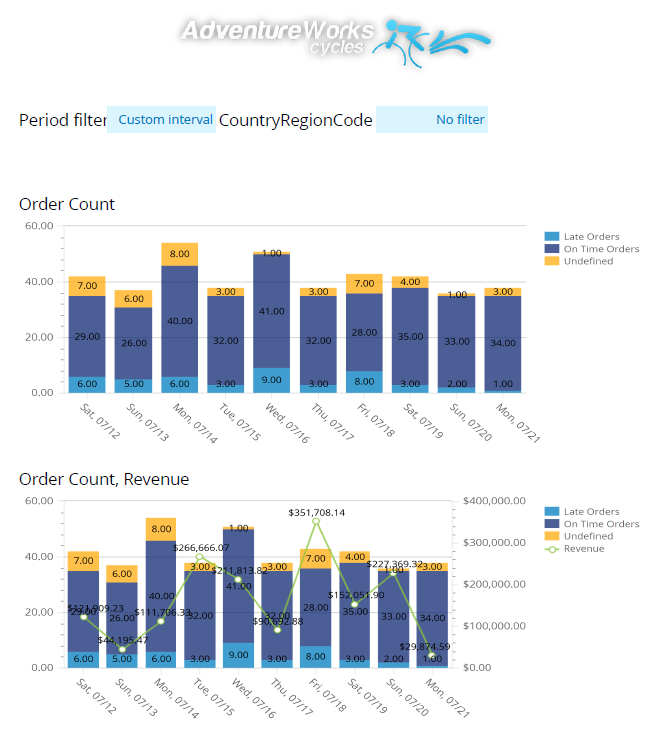
The Report options screen opens.
- Leave the default settings and click OK.
-
Wait until the process is finished (when a spinner icon is
cleared from the Menu component during its duration), and in a standard browser
window, open the generated PDF file.
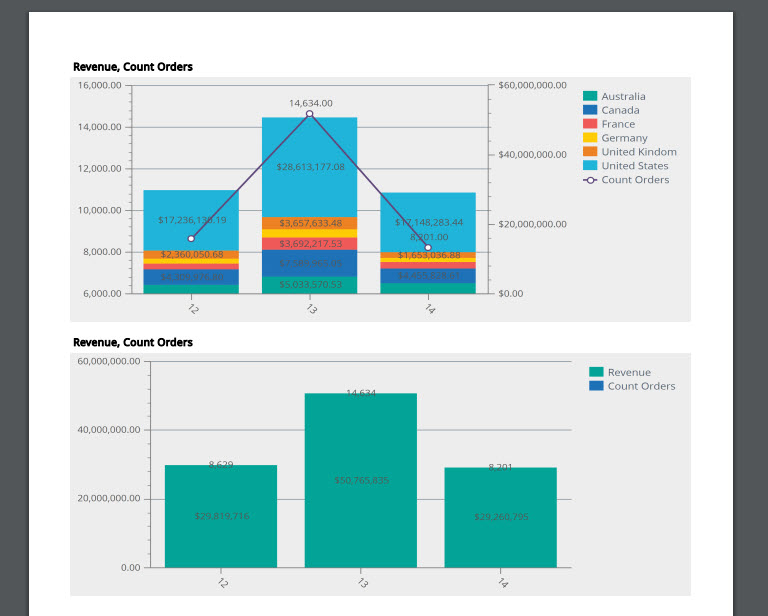
- Try printing a dashboard. In the Menu, select .
- Leave the default settings and click OK.
-
Wait until the process is finished (when a spinner icon is
cleared from the Menu component during its duration), and in a standard browser
window open the generated PDF file.
As you can see, this report also contains the logo and filter panel of the main View.Note The Menu component is never printed in the reports.
Print multiple Views (Print saved report)
In this exercise you will generate and print a report that contains multiple Views.
- In Studio, on the Documents Tree, right-click Reports and select New Report. Name the report Report and click OK.
-
To add multiple Views to the report, click
Edit View list. Select
Charts,
Map,
Metric Grid. Click
OK.

- Scroll the page and in the Generation section, select Enabled. Set the Start on to the time a bit prior than current time.
- In the Delivery section, enter your email address.
- In Admin Console, navigate to and verify email settings. If they are not provided, see Alerts.
-
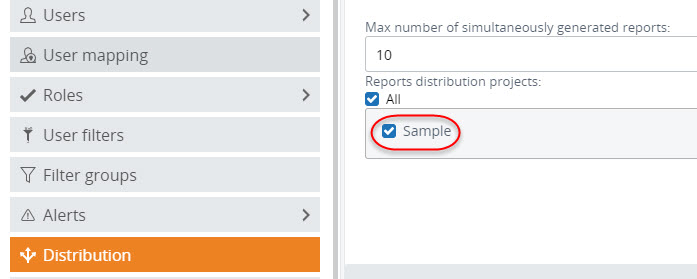
In Admin Console, navigate to
and in the
Report distribution
options, select the Sample project.
-
Save
the changes.
After completing
this exercise, you will receive a report by email. Now you are able to
configure and receive different reports.