Table extraction for 2-column layout
The following configurations are required prior to performing table extraction:
-
Make sure you add the Table Extraction plugin in the Extraction module.
-
Turn on the Table Extraction switch on the Table Extraction Plugin Configuration screen.
It is also important to make sure that the page is divided into two columns before using the 2-Column Layout option for table extraction. In the below example, the table contains data segregated into two columns with repeating headers.
You can use 2-column layout extraction in the following cases:
-
To extract data from the table only in the right column of the page.
-
To extract data from the table extending from the left column to the right column on the same page.
-
To extract data from the table starting in the right column of the first page and extending to the left column of the second page.
Extract data from tables with a 2-column layout
- Open or create a Batch Class.
- Create a new Document Type.
- Navigate to the Document Type and click on the Tables section in the left panel.
- Click Add to add a new table.
- Navigate to Table Columns and click the Add button to add the table columns.
- Click Apply to save your changes.
- Navigate to Table Extraction Rules in the left panel and add a new Table Extraction Rule.
- On the Table Extraction Rule screen, click the Select Files link or simply drag-and-drop the file containing the table.
-
Configure a Table Extraction Rule:
-
Enter a name for the Extraction Rule and select Table Extraction API in the Extraction Rule tab.
-
Select the 2-Column Layout check box.
-
Collapse the Extraction Rule tab to get a better view of the Column Configuration tab.
-
From the Table Column drop-down list on the Column Configuration tab, select a pre-defined column.
-
On the left-hand side, drag-and-drop the Start Pattern and End Pattern overlays to define the beginning and end of the table. Both patterns must be unique, they must not appear anywhere else in the document. If required, you can also use the Pattern Left and Pattern Right overlays to indicate areas to the left and right of the Column header.
-
Specify Column Header and Column Data by using the corresponding overlays. If the table does not have column headers, you can specify only Column Data and use table extraction based on regex or column coordinates ().
-
Select the existing Regex or create a new Regex for each value by clicking on each overlay and using the Suggest Regex dialog box.
-
Click the Validate Regex button to validate the defined Regex patterns.
-
-
Click the
Test Table button.
The extraction results are populated in the Test Table Results section on the same screen.
-
Click
Apply to save the configuration.
-
To extract data from the table only in the right column, follow the same steps as described above, but in this case, place the Start and End Pattern overlays in the right-hand column. Click Test Table to see the values extracted only from the specified table area.
-
To extract data from the table extending from the right column of the first page to the left column of the second page, place the Start Pattern overlay in the right column of the first page and use the corresponding overlays to specify Column Header/Data.
Use the Page Number drop-down list in top right corner to move to the second page and use the End Pattern overlay to specify the end of the table. Make sure that both Start and End Pattern overlays are unique.
Click the Apply button to return to the Table Extraction Rules list. Here, select the rule and click the Test Table Extraction Rule button.
The results extracted from both pages are populated on a new screen.
You can check the results extracted from the tables extending from one page to another by using the Test Table Extraction Rule button on the Table Extraction Rules list screen. The Test Table option offered on the Table Extraction Rule screen will only fetch results from one page that is displayed in the left-hand section of the screen.
-
In some cases, despite applied configurations, table extraction might fail to produce the necessary results. Consider the following example. In this case, data must be extracted only from the right column.
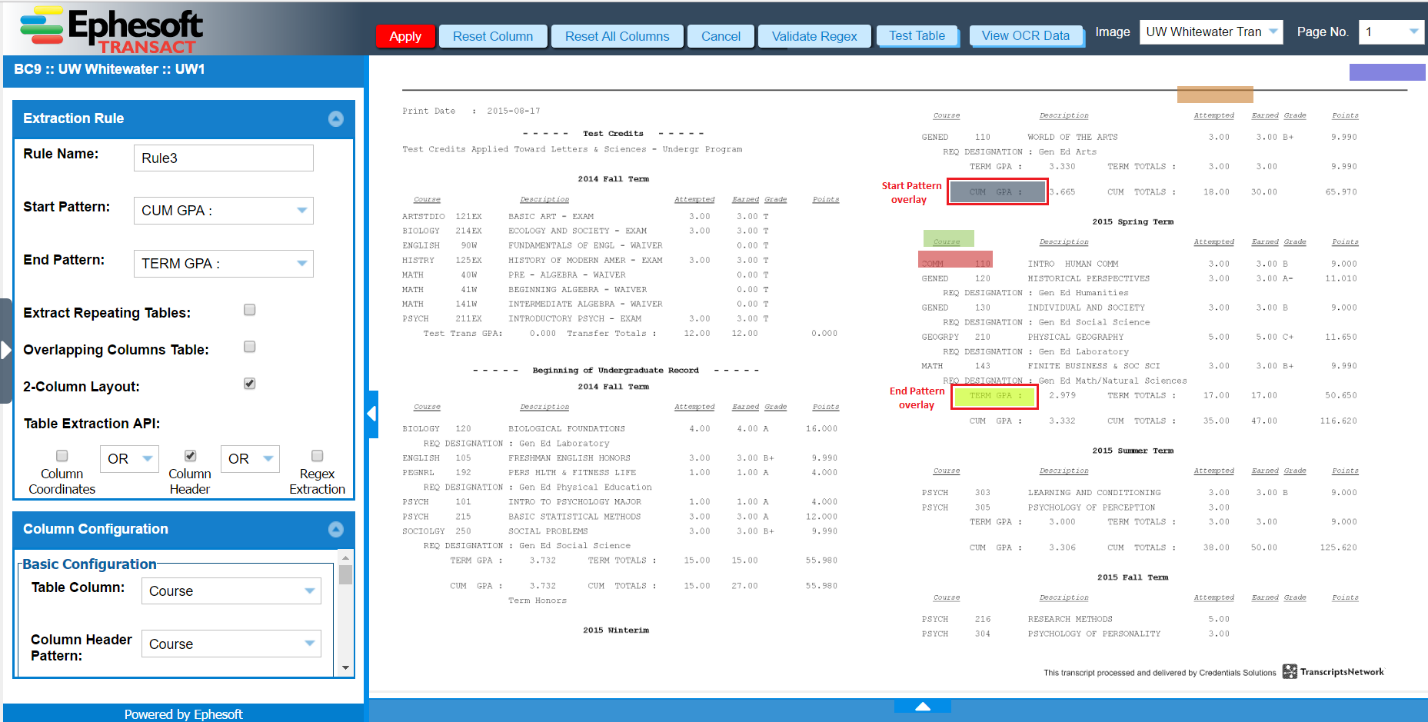
However, when you click the Test Table button, values are extracted from both the left and right columns.
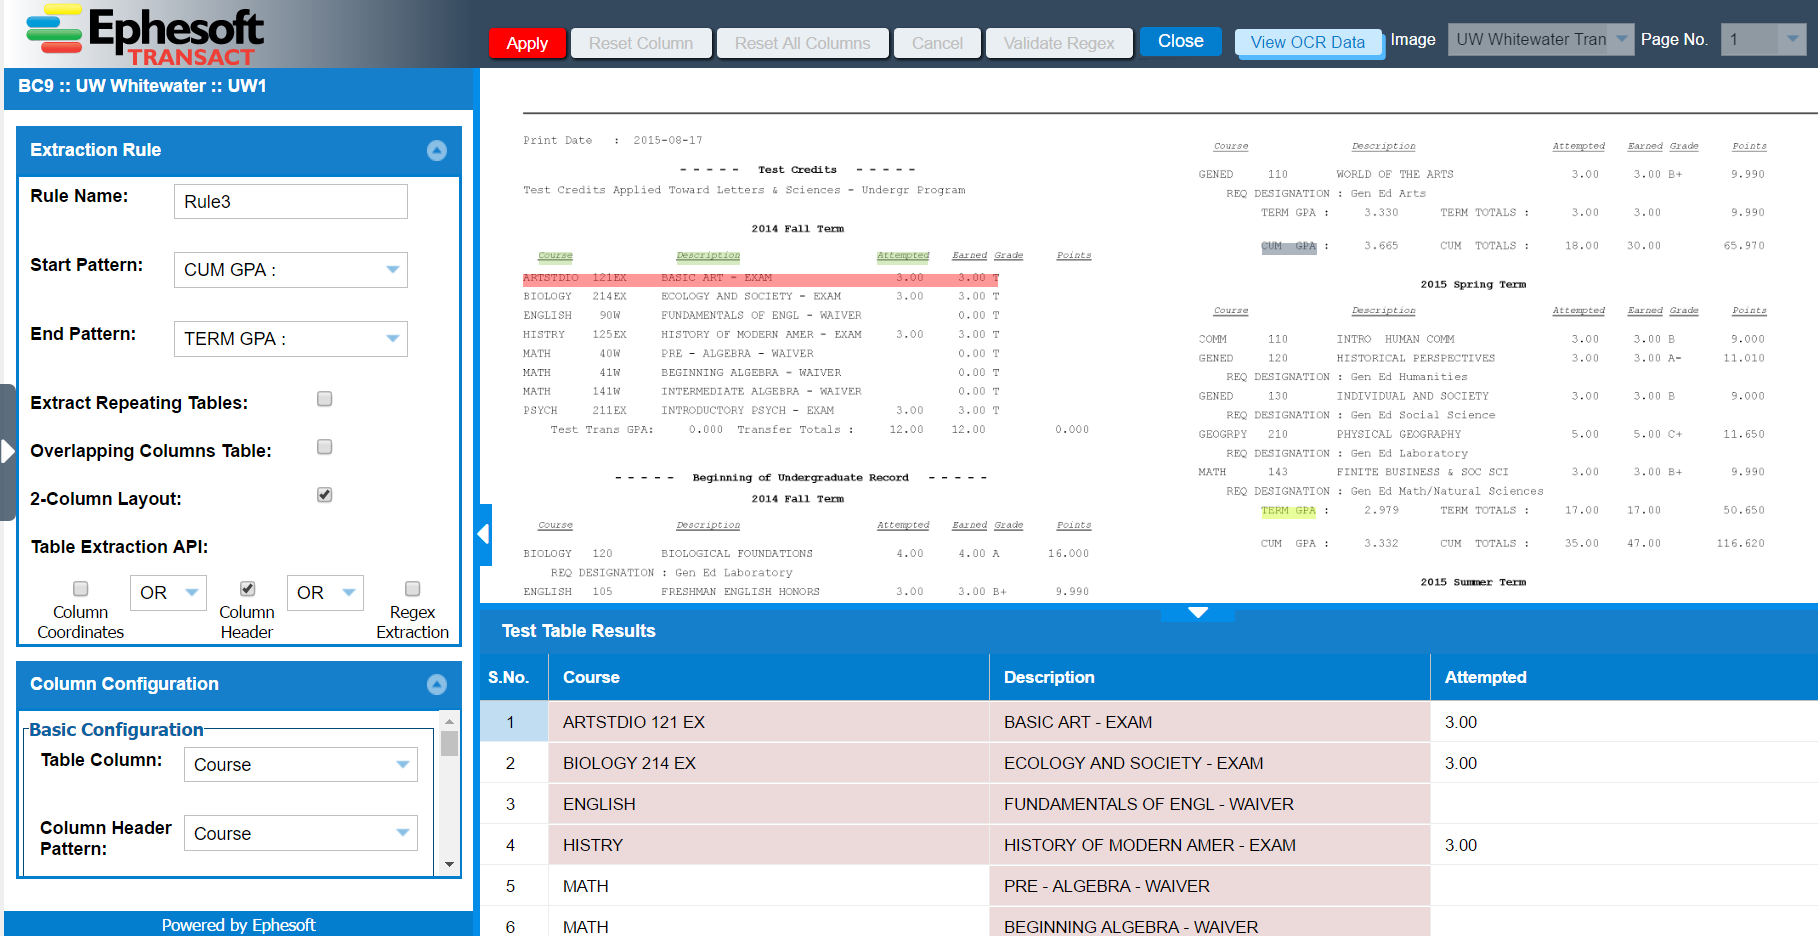
This happens because the selected Start and End Patterns are not unique. It is important to remember that table extraction is applied to the entire document. So, if your Start and End Patterns are not unique, the application will fetch results which are beyond the required scope.
The user must change the Start Pattern and extend the End Pattern overlay to include unique data.
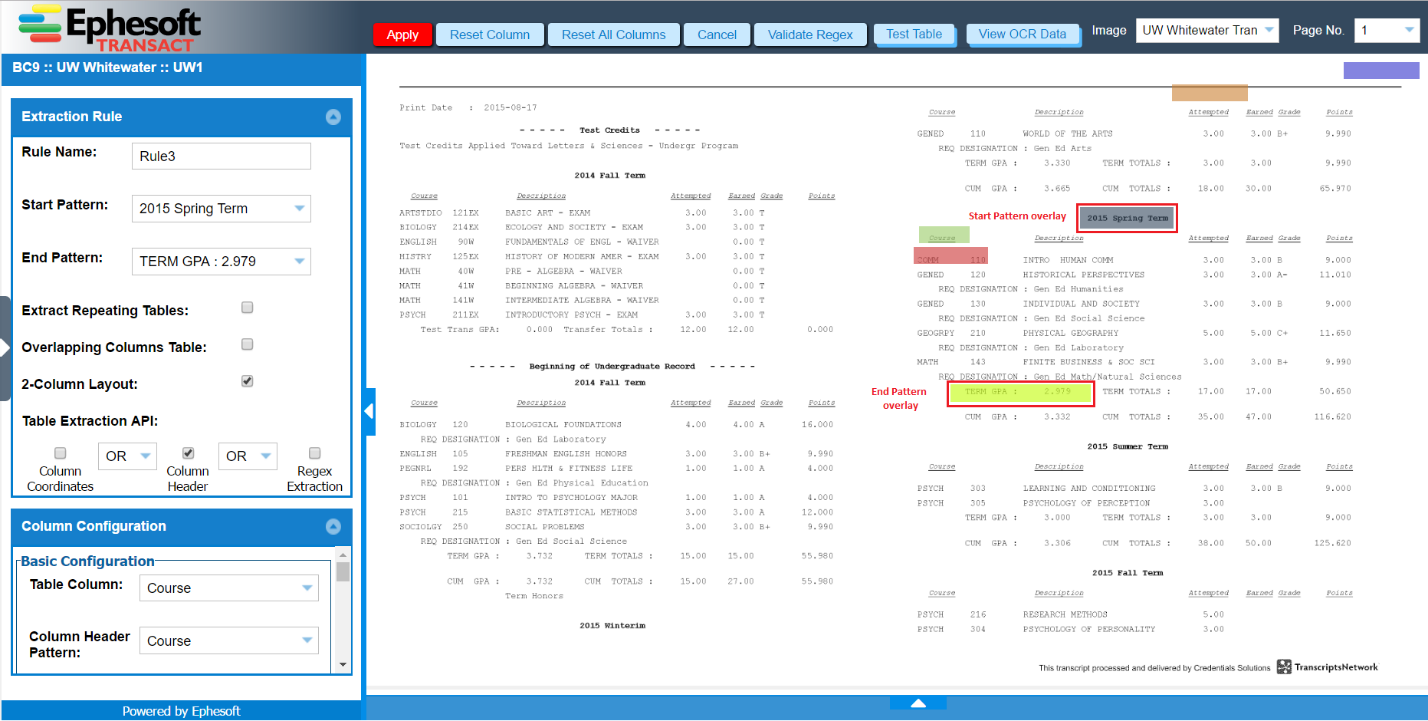
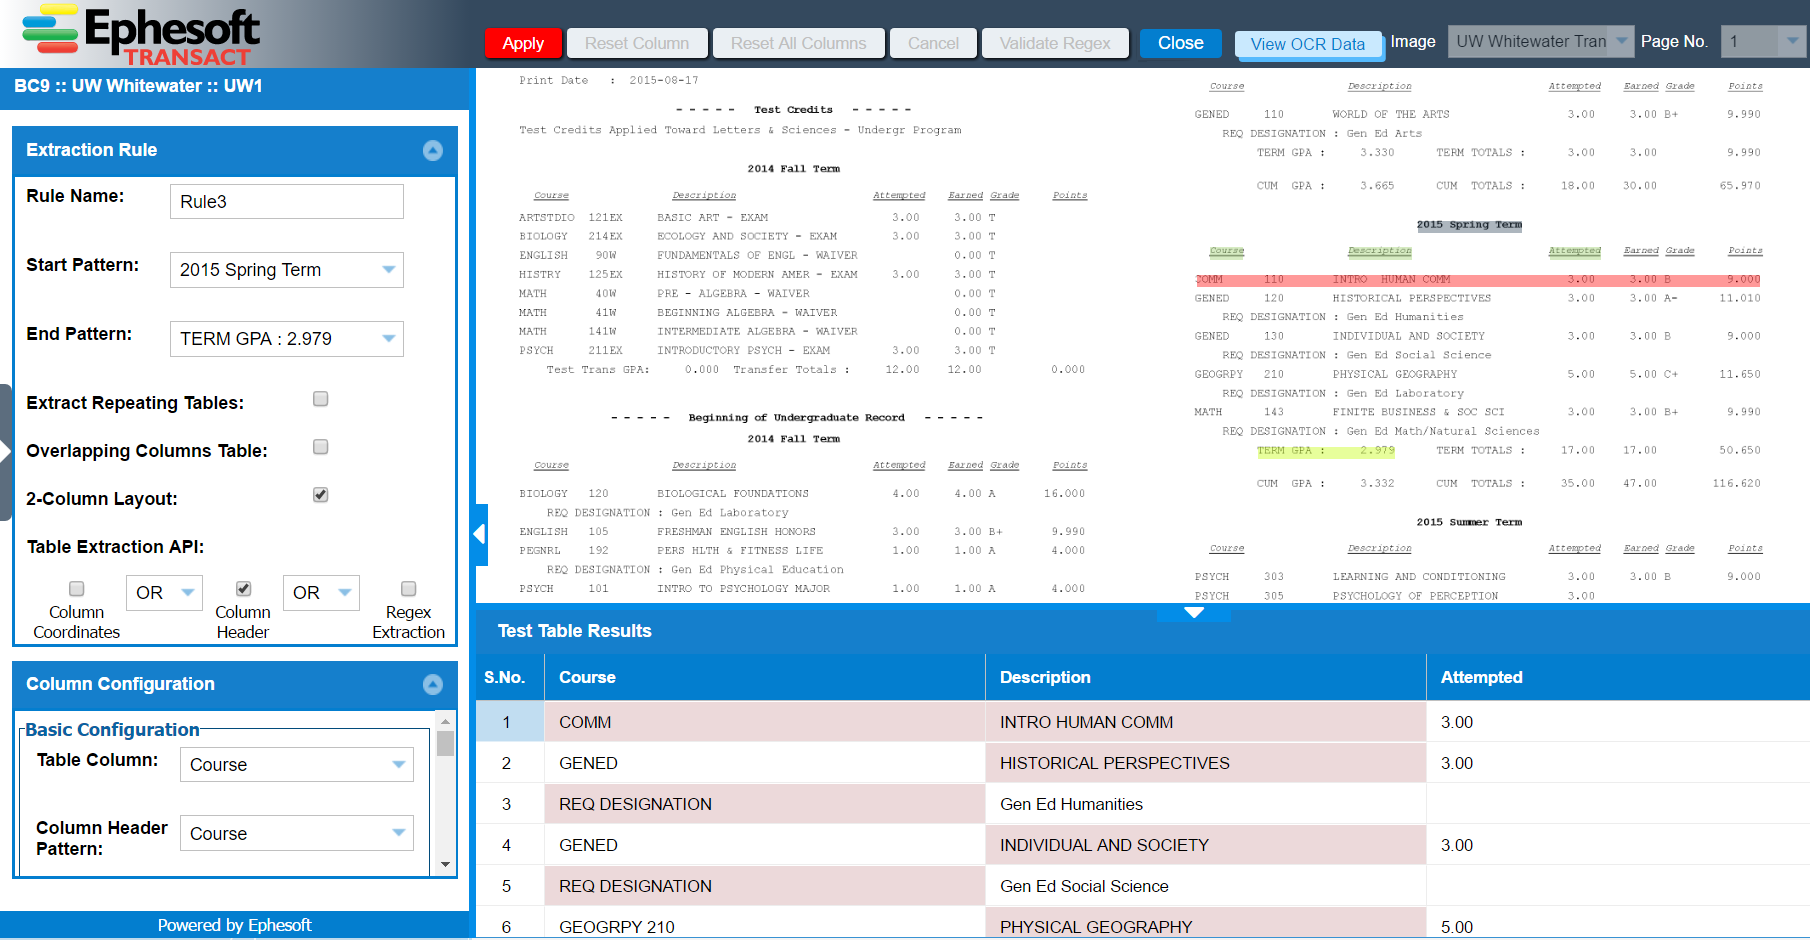
To check table extraction results, click Test Table. Now, the data is extracted correctly.
In all cases, make sure to check that:
-
The Table Extraction plugin is added and turned ON in the Extraction Module.
-
The document has a 2-column layout.
-
The 2-Column Layout check box is selected.
-
The Table Extraction API is selected correctly.
-
The Start and End Patterns are unique and do not appear anywhere else in the document.