Use labels for multiple DAS setup
In your RPA setup, you may have multiple instances of the Desktop Automation Service (DAS) installed on different computers.
To connect multiple DAS instances to
Design Studio
simultaneously, you need to create separate devices for them. After that, ensure they are listed under
Required Devices on the
Action tab of the Call Robot step in the Basic Engine Robot
![]() .
.
When the DAS is installed on a desktop or a virtual machine, such a computer does not usually have an extensive set of
software applications installed. Adding labels helps identify which software is installed on each computer and can be used by the
Robot
 .
.
Later, when the Robot
needs
to automate a particular business application installed on the computer, the system finds an available DAS that provides all labels
required by the Robot
.
Possible scenarios include:
- Multiple setups are used with different DAS versions, while the business application to be automated can only work with a specific DAS version.
- Different desktops may be set up with different platform versions (Microsoft
Windows), which may impact the Robot
configuration.
Follow the procedure below to assign labels.
- Start the Desktop Automation Service from the Start menu. Once the service starts, you can see its status by looking at the icon in the notification area.
- Right-click the Desktop Automation Service
 icon in the notification area and click
Configure. This action opens the Desktop Automation Service window.
icon in the notification area and click
Configure. This action opens the Desktop Automation Service window.
- On the
Management Console tab, in the
Labels field, type the labels. In the example below, the DAS is installed on a
computer that has Microsoft Windows 10, the Microsoft Edge browser, and the Team Foundation Server (TFS) application installed. The
labels must be separated by commas and must not contain any spaces between the comma and the next label.
Within your organization, you can create any labels, without any limitations.
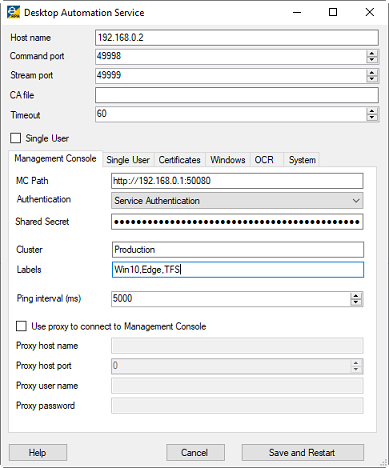
- Click Save and Restart.
- Check that the device is registered in the Management Console under .
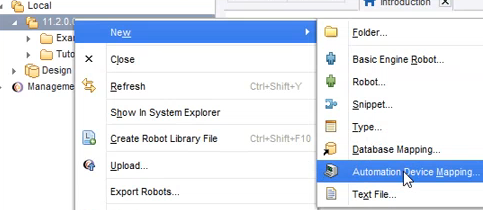
- Launch Design Studio.
- Right-click the required project in the
Projects list and select
.
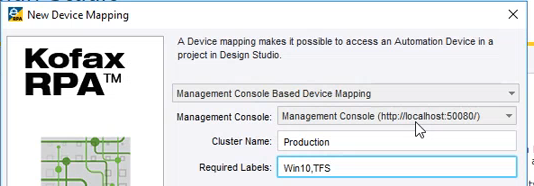
- In the New Device Mapping screen, name the new mapping and click Next.
- Ensure that
Management Console Based Device Mapping is selected and type the required
labels. In the example below, the Robot
is
going to automate the TFS application on a computer with Microsoft Windows 10 installed.
- Finish the configuration and map the Robot
to
this device.
To execute the Robot on two computers with the DAS, create two device mappings with different labels in Management Console.