Templates
Use the Templates page to create and edit templates, which function as the base for Kapplets. Templates can be created by developers, administrators, and global administrators.
Create new template
-
Navigate to the Templates page.
-
Click the plus sign in the upper left corner to create a new template.
-
On the General page, configure the following information.
-
Name: Type the template name.
-
Workspace: Select the workspace from the drop-down list.
-
Description: Type a short description to add more information about the template.
-
Timeout value and Time unit: Set the preferred timeout value and select the time unit to specify how long robots remain in a queue on RoboServer. The timeout applies to all robots in a template. Default is 600 seconds.
-
Icon: Add an icon to make the template unique and easy to distinguish. By default, the icon is inherited from the workspace. To change the icon, either select an image from the Gallery or upload a new one. Tag the uploaded image to make it easy to find among the other images.
The image Gallery supports only .png and .jpeg files.
-
-
Click Next.
-
On the Robots page, select one or more robots.
If the robot list is too long, use the search field to find the robots you want.
-
When selecting multiple robots, click the Selected robots
 button on
the toolbar to view robots you have selected. The number of selected robots is shown on the button.
button on
the toolbar to view robots you have selected. The number of selected robots is shown on the button.
-
On the Selected robots pane, use the Run sequentially button to define the robot execution order.
-
Filter robots by a Management Console project on the Settings pane.
-
-
Click Next.
-
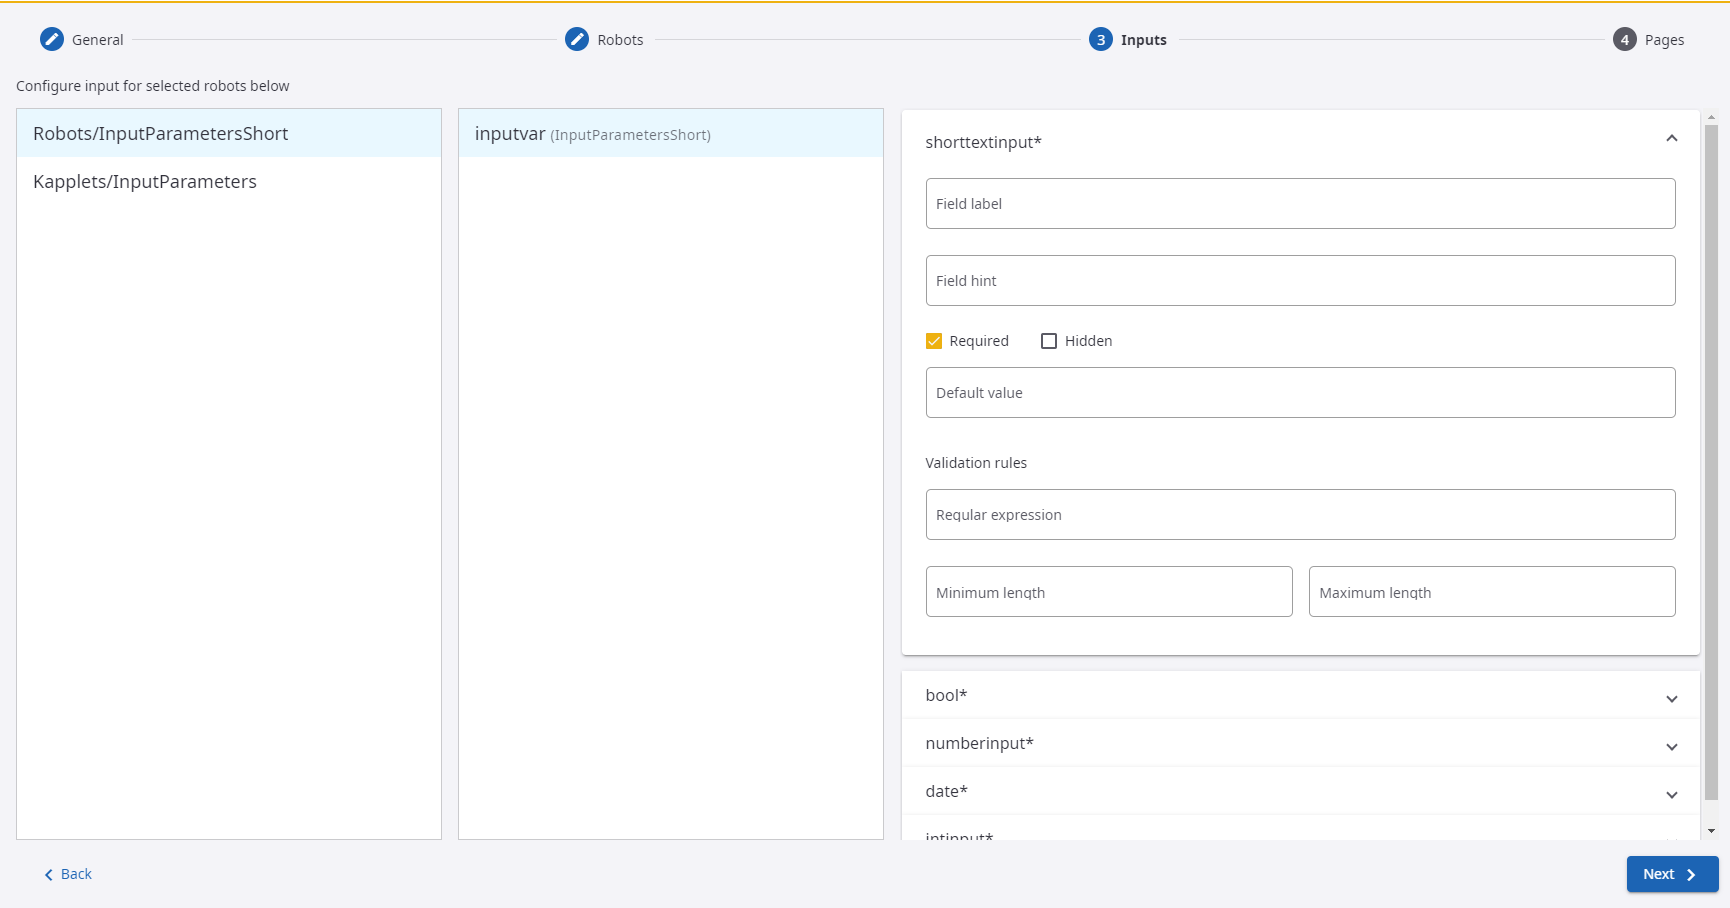
On the Inputs page, configure input parameters for the selected robots.
This step is added to the procedure if one of the selected robots contains input parameters.As you set input parameters and validation rules on the Inputs page, they are automatically validated. If an error is returned, correct the input parameter and/or corresponding validation rule. When the input is valid, the Next button is active.
-
Select a robot to see its variable types.
-
On the window with robot variables, click a variable to configure its attributes.
-
All of the attributes are listed on the window next to the variables window.
-
On the Inputs pane, type in a Field label and Field hint for display on the Start page.
-
Select the Required and Hidden check boxes as needed to configure how the fields are represented on the Start page.
-
Configure individual parameters. The set of parameters depends on each attribute.
-
-
Click Next.
-
On the Pages pane, configure the following as needed.
-
On the Start page, edit the page title and type a description for the page in the Page text field.
-
Drag an item on the Fields order list to change its order.
-
On the Status page, edit the page title.
-
To see the execution result in a table, click the Add table page
 icon on the toolbar.
-
On the Table page, edit the page title and description.
-
Select a robot in the drop-down list to configure its parameters. The Return Type list consists of the output types of the selected robot.
-
Click a parameter to define its fields for the table.
-
Use the Available Commit Action option to assign different robots for committing an action for each of them. For more information, see Select robots for Commit Action.
-
-
To see the execution result in a chart, click the Add chart page
 icon on the toolbar.
-
On the Chart page, edit the page title and description.
-
Select a robot in the drop-down list to configure the parameters to display on the chart.
- Select the following parameters:
-
Chart type
-
Color scheme
-
Label axis
-
Data axis
-
- Configure other chart parameters.
-
Preview the chart by clicking the Preview button.
-
-
-
Click Save to save the template.
A template object looks similar to the following. To create a Kapplet from the template, see Create Kapplets.

Edit template
To modify or remove a template, click the Open context menu button.
When you edit input parameters and validation rules on the Inputs page, they are automatically validated. If an error is returned, correct the input parameter and/or corresponding validation rule. When the input is valid, the Next button is active.
Select robots for Commit Action
When you use two robots consecutively, you may need to use the output data of the main robot as the input data for one or more supporting robots. Each supporting robot should be designed so that it has only one input and one output type. If the main robot has several output types, assign other robots for committing actions. The input and output types must match in the supporting robots. The following procedure describes how to pass data between robots.
-
Navigate to the Templates page.
-
Create a new template or edit an existing one.
-
Navigate through the configuration panes until you reach the Pages pane.
-
Locate the "Return Types" list, which consists of the output types of a selected robot.
Available and unavailable types for committing an action appear in separate cards.
-
To the right of the available types, on the Available Commit Action pane, select a robot from the drop-down list.
You can assign all the robots for the available return types at once.
It is vital that the input and output types are identical. Check them carefully if a notification "No Robots available for Commit Action" appears in front of the types you want to use.
-
Execute the main robot.
-
After the main robot has finished its execution, select the History page.
-
On the Table page tab, view a list of the supporting robots set in the previous steps.
-
Select one or more supporting robots by checking the Select for Commit Action box.
-
When the Commit Action button in the top-right corner of the table becomes active, click it to view the results of the execution.
You cannot execute the same robot twice.
-