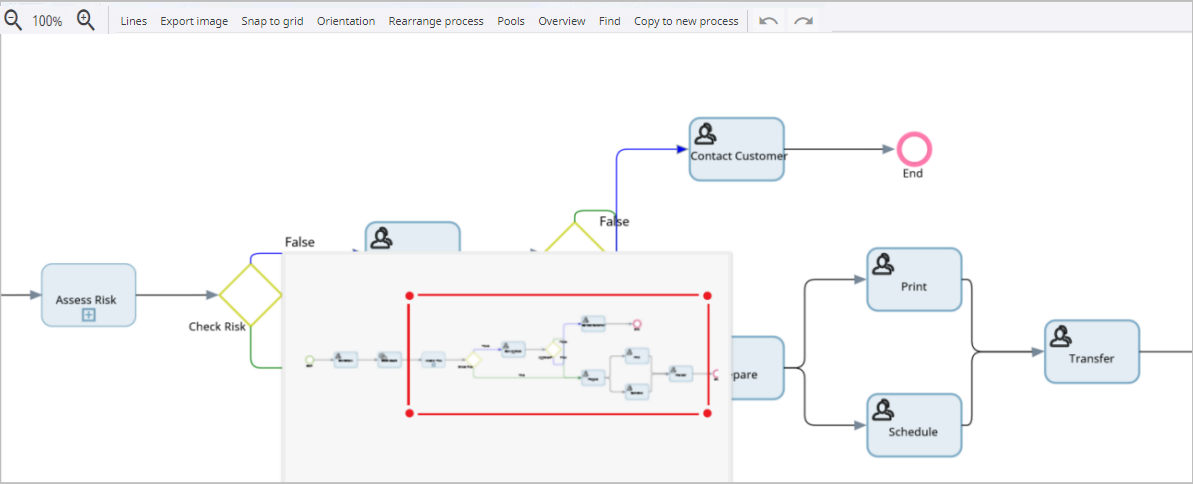
Action toolbar
The Action toolbar contains a set of commands to perform actions such as zoom in and zoom out, snap to grid, rearrange process and undo and redo.

- Zoom in and Zoom out
- By default, the workflow is displayed 100%. You can use the following buttons to zoom in and out of a process.
-
: Zooms out of a process for a broader view.
-
: Zooms in on a process for a close-up view.
-
- Lines
-
Displays the grid in the process design area.
- Export image
-
Downloads the process image to your system.
- Snap to grid
-
Automatically aligns the activity to the nearest grid. The gridlines assist with the layout of your process.
Auto placement: Automatically places the activity to the nearest grid horizontally and by the current activity. Places the activities added to decisions above or below the decision. If the Auto Placement option is turned off, then you can drag the activity to the required location.
- Orientation
-
Changes the direction of the map layout from vertical to horizontal and vice versa as appropriate for your process or target audience.
- Rearrange process
-
Rearranges the process map.
- Pools
-
Displays the process map in a pool.
- Overview
-
Displays an overall picture of a large process in a panel. You can also navigate (pan or zoom) to a particular activity using the mouse. See the following image for Process Overview Panel.

- Find
- Displays the list of all nodes within a process. You can search by the name, node ID, and filter the list by the node type.
- Copy to new process
- You can copy the group of nodes to a new process using
"Copy to new process". A new process is created with the selected nodes. Items such as variables, states,
milestones, roles, process events, and data models, are also copied along with the nodes. You can reuse the selected nodes across
different processes.
-
If the selected nodes are not connected, a message is displayed stating: "Copied nodes must be connected".
-
The End nodes are not added automatically, therefore, you must also select the end nodes if you want to add them to the new process. Otherwise, you will have to add them manually.
-
The "Copy to new process " option is only available in "Business processes "and "Case definitions"; it is not available for business rules, custom services, and case fragments.
-
To select multiple nodes, you can also use "Shift" or "Control" on your keyboard.
-
- Undo and redo
-
You can undo/redo changes within a process using the Undo or Redo icons. You can undo/redo a maximum of 30 updates, such as typing or design changes. The undo/redo list is cleared when an update is made on any area outside the Design tab.
You can undo or redo the following changes in a process:
-
Process property changes
-
Activity property changes
-
Canvas changes, such as adding nodes, deleting connectors, changing orientation, rearranging process, and more
The following are some of the scenarios of using the Undo command:
-
When you change a basic property, such as Name, and then undo the change, the property is reverted to its previous value.
-
When you change a property that requires a pop-up and then undo the changes, the configuration is reverted to its previous value. For example, if you make changes to the configuration on a .NET node, click OK, and then undo the changes, the configuration is reverted to its previous value.
-
When you change a property that has a table with inline editing, such as triggers on a node, and when you add a row, enter the details, click OK and then undo the changes, the row is reverted to its previous value, or removed if it was added.
-
When you change a property that has a table that uses a dialog for editing, such as Resources on a node, and you select two resources, click Done, and then undo the changes, the resources are reverted to their previous value.
-
When you change a property that has a table with inline editing directly on the cell, such as dependents on a node, and when you select the “Is Dependent” check box, and then undo the changes, the check box is reverted to its previous value.
-