
How to add print queues to a group
-
Open the
Group
properties page.
Only available if groups (Microsoft Entra or Google) are enabled.
-
Select the
Print queues
 tab.
tab.
-
Select
Modify
 .
.
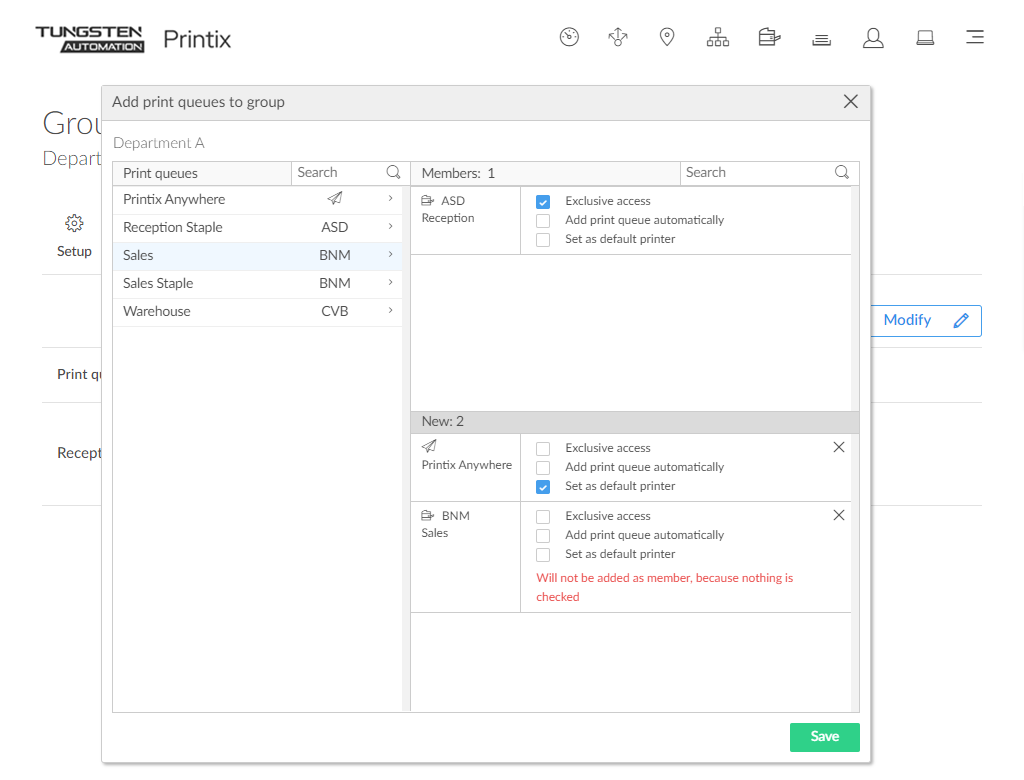
-
Select the print queues to be added to the group.
For each print queue, select the relevant options:
-
Select Exclusive access if you want to give the group members exclusive access to the print queue.
-
Select Add print queue automatically if you want the print queue to be added automatically to the computers in the group. Users in the group will have the print queue added to the computer when they sign in.
-
Select Set as default printer if you want the print queue to become the default printer for the users and computers in the group.
-
Only one print queue in the group can have this selected.
-
If Set as default printer is selected for multiple print queues, it will be random which one will be set as default. Printix Client will override the user's selection of default printer every time the Printix Service is started and or it receives updates to its list of printers and their configuration.
-
-
-
Select
Save.
Print queues with no options selected will not be members of the group.