
How to enable Print Anywhere
The ideal method if you need to print confidential documents with finishing options and want to ensure your documents print exactly as intended. The document can only be released at the selected printer.
-
Select Menu
 > Settings
  .
.
-
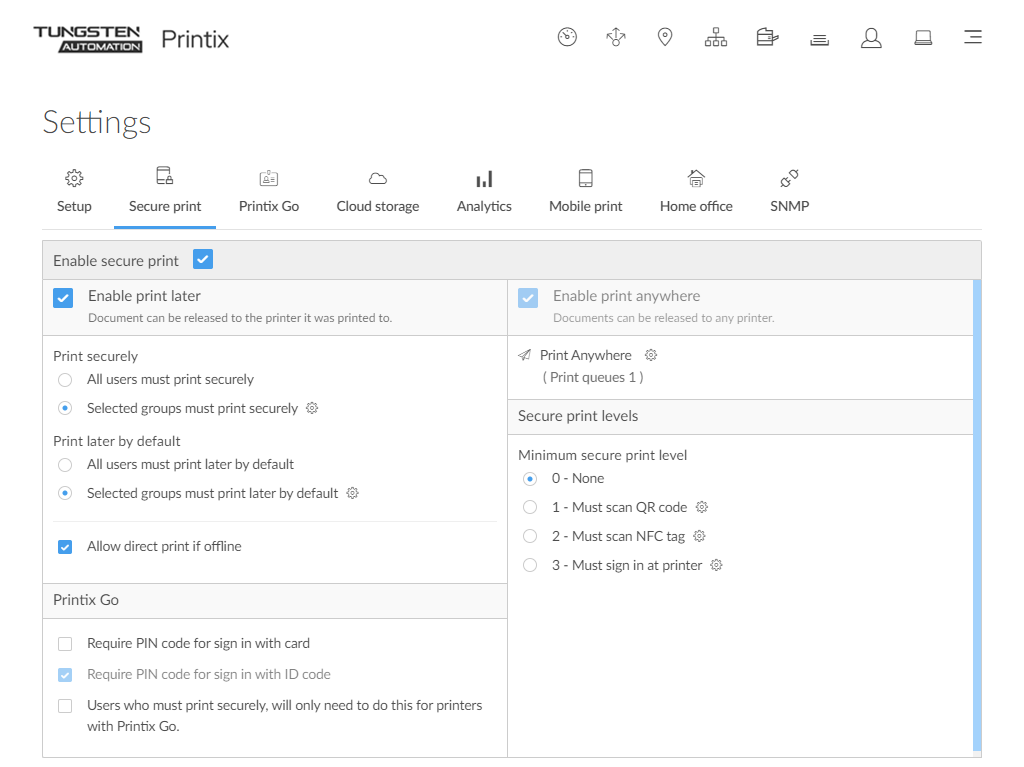
Select the Secure print
 tab.
tab.
- Select Enable secure print.
-
Select
Enable Print Anywhere.
-
Document can be released to any Printix (ASD, BNM, …) printer.
-
Document is sent as PDF, except if the printer does not support PDF printing or Process PDF/XPS is selected. In this case, the PDF document is processed using a matching print driver.
-
-
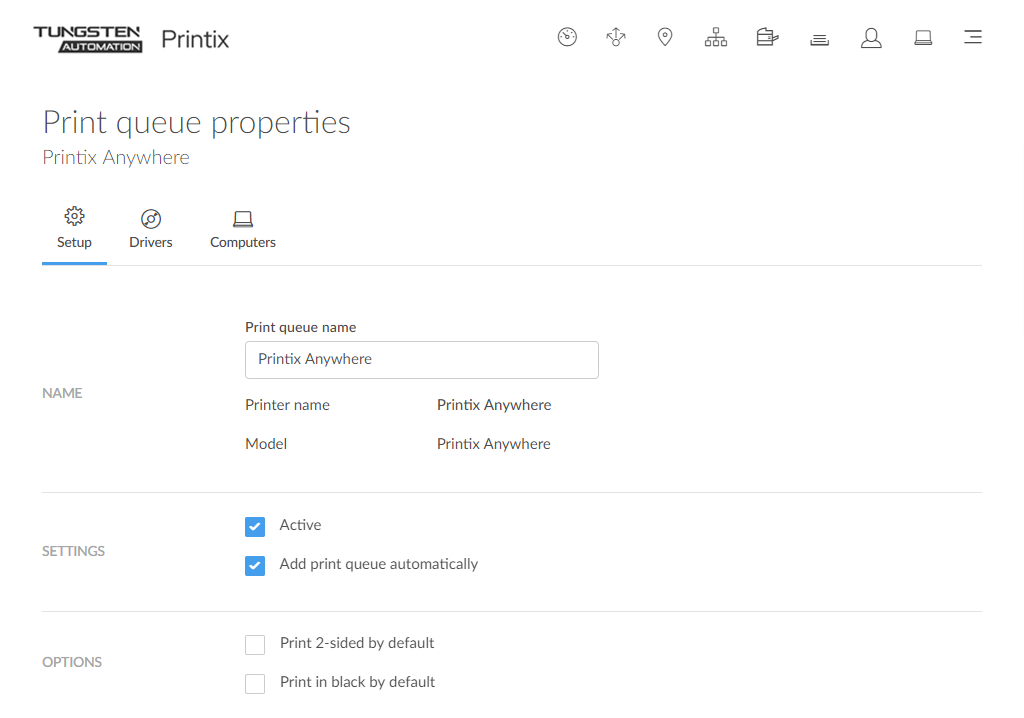
Select
Setup
 and then
Create print queue to create a Print Anywhere print queue.
and then
Create print queue to create a Print Anywhere print queue.
-
In the
Create print queue dialog box, enter
Print queue name.
Example: Printix Anywhere
-
Cannot contain the characters "\" and ",".
-
Must be unique for the printer. Uppercase and lowercase letters are treated the same.
-
- Optionally, clear Active to allow administrators (you) to test printing before allowing users to add the print queue.
-
Select
Save.
-
If you want to add print queue automatically, then select Setup
and then
Print queues and then select
Print queue name (Printix Anywhere) to open the
Print queue properties page and select
Add print queue automatically and select
Save.
-
Using Print Anywhere is described in the: Printix User Help
How to create an additional Print Anywhere print queue
-
Select
Setup
and then
Create print queue to create an additional Print Anywhere print queue.
-
In the
Create print queue dialog box, enter
Print queue name.
-
Cannot contain the characters "\" and ",".
-
Must be unique for the printer. Uppercase and lowercase letters are treated the same.
-
- Optionally, clear Active to allow administrators (you) to test printing before allowing users to add the print queue.
- Select Save.