
How to deploy Printix Chromebook
- Sign in to the Google Admin console (admin.google.com) using your administrator account (does not end in @gmail.com).
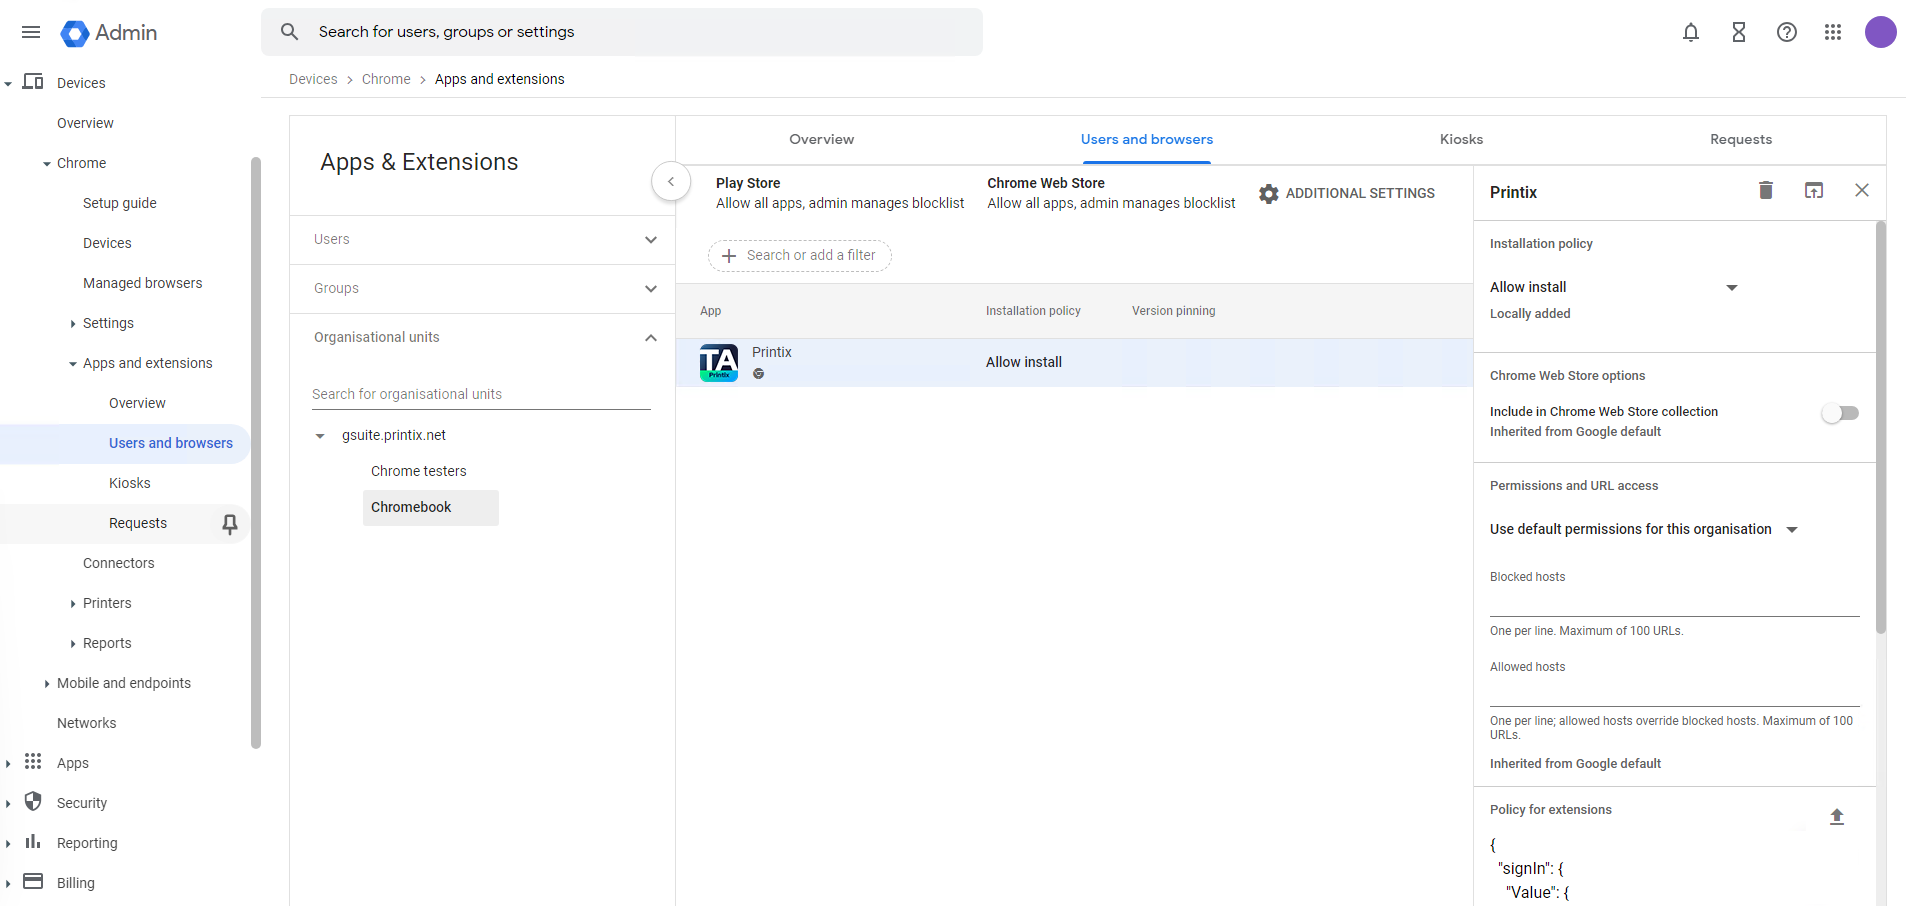
- On the left-hand menu, select .
- In the Organizational units section, select the organizational unit where you want to deploy Printix.
-
Optionally, if you want users to sign in with Windows, then in the right pane, scroll down to
Policy for extensions and select
Upload from file
 . Select the
configuration file you created
and select
Open.
. Select the
configuration file you created
and select
Open.
- Select Force installation.
-
Select
Save.
Chromebooks are not listed in Printix Administrator, only computers running Printix Client.
Configuration file
If you want users to Sign in with Windows, a configuration file must be created and uploaded. If no configuration file is uploaded, users will still have single sign-on (SSO) to Printix with their Google Workspace account. The configuration file must be in JSON format and should be saved as a .txt file.
{
  "signIn": {
    "Value": {
      "tenant": "acme.printix.net",
      "tenantId": "cbd7e0b5-da2a-4cb6-b7f7-a04ee31cac90",
      "method": "both"
    }
  }
}
Values:
-
tenant
The value tenant is your Printix Home. Example: acme.printix.net.
-
tenantId
The value tenantId should be your Printix ID as shown on the Software page's MSI parameter section. Example: cbd7e0b5-da2a-4cb6-b7f7-a04ee31cac90.
-
method
Configures the sign-in method. Values:
-
azure
Users can sign in with their Microsoft work or school account. Requires that you enable Microsoft Entra authentication.
-
azure SSO
Select this if users' Microsoft work or school account is used for single sign-on (SSO) to users' Google Workspace account. Requires that you enable Microsoft Entra authentication.
-
google
Users can sign in with their Google Workspace account (not @gmail.com). Requires that you enable Google authentication.
-
okta
Users can sign in with their Okta account. Requires that you enable Okta authentication.
-
onelogin
Users can sign in with their OneLogin account. Requires that you enable OneLogin authentication.
-
both
Users can sign in with their Microsoft work or school account, Google Workspace account, or their Printix account. Requires that you enable Microsoft Entra authentication and enable Google authentication.
-
How to control the default and available paper sizes
If you want Letter to be the default, write NA_LETTER first. Google Chrome does the sorting of the paper sizes.
{
 "paperSizes": {
 "Value": ["NA_LETTER", "NA_LEGAL"]
  }
}| Paper size | Value |
|---|---|
| A3 | ISO_A3 |
| A4 | ISO_A4 |
| A5 | ISO_A5 |
| B4 | ISO_B4 |
| B5 | ISO_B5 |
| B4 (JIS) | JSI_B4 |
| B5 (JIS) | JSI_B5 |
| Executive | NA_EXECUTIVE |
| Legal | NA_LEGAL |
| Letter | NA_LETTER |
| Statement | NA_STATEMENT |
| Tabloid | NA_TABLOID |