
How to deploy Printix Client with Microsoft Endpoint Manager
You can automatically deploy Printix Client with Microsoft Endpoint Manager. If you also enable Microsoft Entra authentication, users are automatically registered the first time they sign in to Printix Client with their Microsoft work or school account. Can I use Microsoft Intune for Education?
-
For the requirements of the Printix Client, see the Tungsten Printix Technical Specifications.
-
Sign-in to the Printix Client is automatic on Microsoft Entra joined Windows 10 and 11 computers and works with the Pro, Enterprise, and Education editions. Microsoft does not support Microsoft Entra join on Windows Home editions.
The Printix Client Microsoft Installer (MSI) package and the MSI arguments are available on the Software page.
-
MSI arguments
Select the relevant one to copy it to the clipboard.
-
Sign in after installation
Sign-in will occur right after Printix Client is installed. This is the default behavior.
-
Sign in postponed until restart
Deploy Printix Client without starting the user interface (PrintixClient.exe). This method can be used to install Printix Client as part of an automated process (such as Windows Autopilot) that completely configures a new computer before this is delivered to the user. This way, sign in is postponed until the user starts to use the computer. Only the Printix Service (PrintixService.exe) is started. The computer with Printix Client will only be registered and listed in Printix Administrator after a user has signed in.
-
If users have issues while signing in to the Printix Client after deployment, see Sign-in issues.
- As a prerequisite, make sure that the target computers meet the requirements described in the Printix Client for Windows section of the Technical Specifications document.
- Open the Software page.
-
Select the appropriate installer file
based on your Windows architecture:
-
Printix Client - Windows x64 (MSI)
-
Printix Client - Windows ARM64 (MSI)
This downloads the selected Microsoft Installer (MSI) package.
Example: CLIENT_{acme.printix.net}_{cbd7e0b5-da2a-4cb6-b7f7-a04ee31cac90}.MSI -
- Open a new browser window and sign in to Microsoft Endpoint Manager admin center (endpoint.microsoft.com) using your work account credentials.
- In the Microsoft Endpoint Manager admin center, select Apps.
- On the Apps | Overview blade, under By platform, select Windows.
- On the Windows | Windows apps blade, select Add.
- In the Select app type pane, under the Other app types, select Line-of-business app.
- Select Select to select App package file.
- In the Add app pane, select Select app package file.
-
In the
App package file pane, select the browse button, then select the CLIENT_{home}_{id}.MSI file you
downloaded in step
3.
Example: CLIENT_{acme.printix.net}_{cbd7e0b5-da2a-4cb6-b7f7-a04ee31cac90}.MSI
The app details will be displayed.
-
Select
OK in the
App package file pane to add
Printix Client.

-
On the
App information page:
-
In Name, optionally, edit the text: Printix Client.
-
In Description, optionally, edit the text: Printix Client.
-
In Publisher, type: Printix.
-
App install context is set to Device context and cannot be changed.
-
For Ignore app version, select Yes as the Printix Client automatically updates to the latest version.
-
In Command line arguments, paste the MSI arguments you copied to the clipboard on the Software page.
Example: WRAPPED_ARGUMENTS=/id:cbd7e0b5-da2a-4cb6-b7f7-a04ee31cac90
-
The /id value is your Printix ID as show in the name of the MSI file you downloaded in step 3.
-
After deployment, the /id value is saved in the Windows Registry.
-
If you want to deploy and have sign-in postponed until restart, :oms is appended.
Example: WRAPPED_ARGUMENTS=/id:cbd7e0b5-da2a-4cb6-b7f7-a04ee31cac90:oms
-
-
In Category, select Productivity.
-
For Show this as a featured app in the Company Portal, select No.
-
In Information URL, optionally, type: https://printix.net
-
In Privacy URL, optionally, type: https://printix.net/privacy
-
In Developer, optionally, type: Printix
-
In Owner, optionally, type: Printix
-
In Notes, optionally, type any notes you want to associate with this app.
-
Optional Logo. Select Select image to select for example an image with the Printix logo.
-
- Select Next.
-
Select the
Required or
Available for enrolled devices.
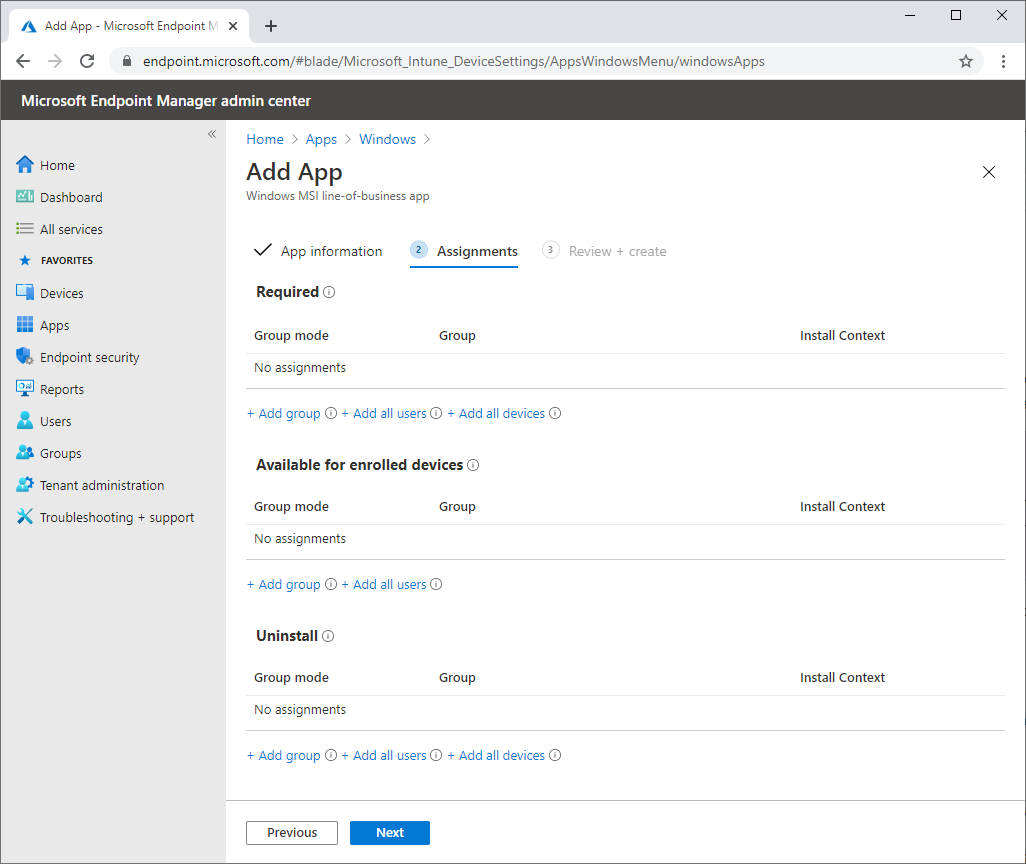
- Select Next to display the Review + create page.
- Review the values and settings you entered.
-
When you are done, select
Create to add
Printix Client
to Intune.
If the Printix Client does not deploy and your Microsoft Entra tenant's MDM authority is unknown, check the Microsoft documentation: Set MDM authority to Intune.
Can I use Intune for Education?
Intune for Education (part of Microsoft Education, Windows 10 (version 1703 or higher)) is a simple but powerful solution for managing policies, apps and settings for your classroom devices. As a subscriber to Microsoft Intune for Education you have also access to Microsoft Endpoint Manager.
To deploy Printix Client to classroom devices you need to open Microsoft Endpoint Manager (not Intune for Education) and follow the above instructions. This is because Intune for Education does not allow you to specify Command line arguments.
Where to find the Printix ID in Windows Registry?
-
Press
Windows+R.
The Run dialog box appears.
-
Type
regedit, then select
OK.
Select Yes if prompted.
The Registry Editor appears.
- Browse to HKEY_LOCAL_MACHINE\SOFTWARE\printix.net\Printix Client\Tenant.
-
The value
TenantId should be your
Printix
ID as shown in the name of the MSI file you downloaded in step
3.
Example: cbd7e0b5-da2a-4cb6-b7f7-a04ee31cac90
The value TenantName is typically your Printix Home (acme.printix.net), however, it may say Printix Auto Name when installation is through MSI/Microsoft Endpoint Manager.