
How to install Printix Go on multiple printers
These instructions do not apply to clientless environments. For vendor-specific instructions about clientless installation, see: Canon, Lexmark, or Ricoh.
How to install Printix Go on multiple printers from the Printers page
-
Select
Printers
 .
.
-
Select the eye icon in the table header and set the view mode to
Printix Go.
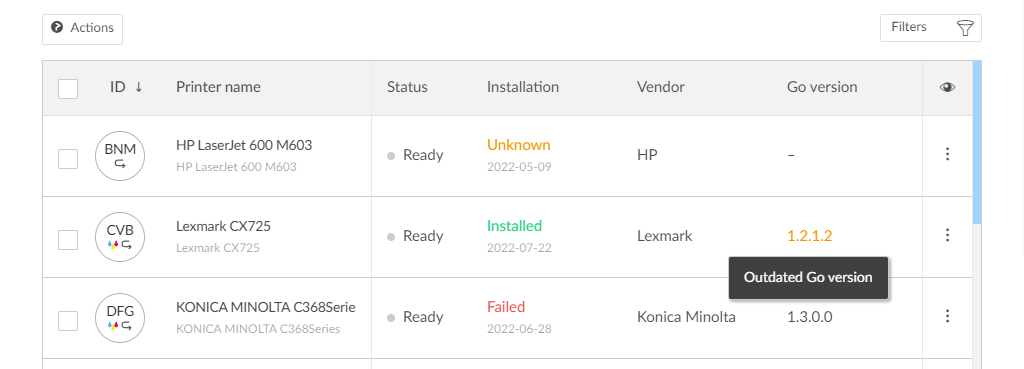
- Select the check box next to the printers you wish to install.
- Ensure that nobody is using the printers during installation.
-
Select
Actions above the table, then select
Install.
-
On Canon, first, install the required Printix Go components through the Canon printer's web page, then install Printix Go through Printix Administrator to configure it to work with your Printix Home.
-
On HP Workpath, first, install Printix Go through the HP Command Center, then restart the printer and install Printix Go through Printix Administrator to configure it to work with your Printix Home.
-
On Ricoh, a computer with Printix Client for Windows must be online on the printer's network during the installation of Printix Go Ricoh.
-
On Ricoh, the installation takes 10–25 minutes (printer restarts 2 times).
-
- Select Install again.
-
After 30 seconds passed, refresh the page and verify that the installation succeeded.
-
On Kyocera, right after this step, also install Printix Go through the KYOCERA Net Viewer.
If the printer does not behave as normal after the installation, restart the printer.
-
How to assign a Go configuration to multiple printers
-
Select
 .
.
- Select the Printix Go tab.
- Select the name of a Go configuration to open the Go configuration page.
-
Select the gear icon
 in the top left cell to open the
Go configuration
in the top left cell to open the
Go configuration
 menu.
menu.
-
Select
Assign to printers.
The printers MUST have a sign in profile.
-
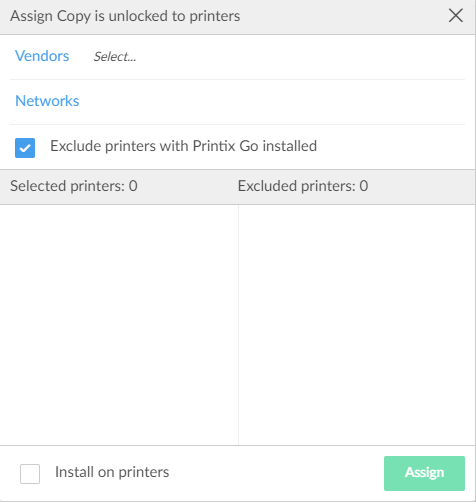
Select
Vendors, then select the printer vendor:
For Ricoh printers, consider making separate configurations, so in the future, when you want to Update the Printix Go Ricoh software, this can be done in stages, yet efficiently. This is because the Ricoh printer will restart once, and this takes 5–10 minutes, and during this period, the printer is unavailable to users.
- Optionally, select Networks and then select the networks that includes the printers you wish to install Printix Go on.
-
Optionally, clear
Exclude printers with
Printix Go
installed.
-
The printers matching the filtered criteria will appear in the Selected printers list on the left.
-
Optionally, move printers to the Excluded printers list on the right.
-
- If you want to not only assign the Printix Go configuration to the printers, but also install them, then select Install on printers.
-
Select
Assign.
-
The assignment/installation is done in sequence. If it fails on one printer, it will just proceed to the next printer.
-
The screen will automatically update as assignment/installations are completed.
-
On Ricoh, a computer with Printix Client for Windows must be online on the printer's network during install of Printix Go Ricoh.
-
How to assign a sign in profile to multiple printers
-
Select
 Menu > Settings.
- Select the Printix Go tab.
- Select the name of a sign in profile to open the Sign in profile page.
-
Select
Sign in profile setup
to open the
Sign in profile
menu.
-
Select
Assign to printers.
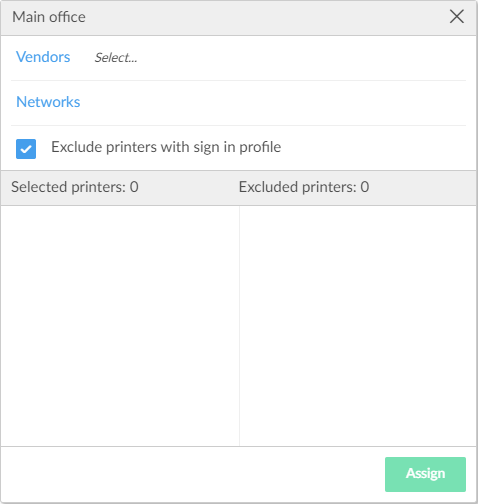
- Select Vendors, then select the printer vendor:
- Optionally, select Networks, then select the networks that include the printers you wish to assign the sign in profile to.
-
Optionally, clear
Exclude printers with sign in profile.
-
The printers matching the filtered criteria will appear in the Selected printers list on the left.
-
Optionally, move printers to the Excluded printers list on the right.
-
-
Select
Assign.
-
The assignment is done in sequence. If it fails on one printer, it will just proceed to the next printer.
-
-
Optionally, select
Verify sign in profile.
-
On Brother, ensure that nobody is using the printer during verification. Otherwise, the user's processes are cancelled.
-
The verification is done in sequence. If it fails on one printer, it will just proceed to the next printer.
-
Sign in profile username and password cannot be blank.
-
-
The screen will automatically update as verifications are completed.
-