
How to enable OneLogin authentication
Before enabling OneLogin authentication, it is necessary to configure OneLogin. If you already configured OneLogin, you can skip to step 16.
- Open a new browser window and sign in to the OneLogin portal (onelogin.com) using your OneLogin administrator account credentials.
- In the OneLogin portal, select Administration.
- In the OneLogin Administration panel, select Applications, and then Applications.
- Select Add App.
- In the search box, search for OIDC, then select the Openid Connect (OIDC) app.
- In Display Name, type Printix.
- Upload a rectangular icon and a square icon.
- In Description, optionally, type Printix Cloud Print Management Service.
- Select Save.
-
On the menu, select
Configuration.
In Redirect URI, paste the Redirect URI value you can copy to the clipboard on the OneLogin tab on the Authentication
 page in
Printix Administrator.
page in
Printix Administrator.
Alternatively, type: https://auth.printix.net/identity-providers/onelogin/signin/response
- Select Save.
- On the menu, select SSO.
-
Copy the
Client ID.
You need to paste it in step 19.
-
Select
Show client secret and copy the
Client Secret.
You need to paste it in step 20.
You can leave the remaining settings at the defaults.
-
If you face any
sign-in issues with OneLogin:
- Log in to the OneLogin portal as an administrator.
- Go to .
- In the Applications table, select the application you configured.
- Select Save.
Now that OneLogin is configured, the following steps describe how to enable OneLogin authentication.
-
In
Printix Administrator on the
Authentication
page, select the
OneLogin tab.
-
Select
Connect.
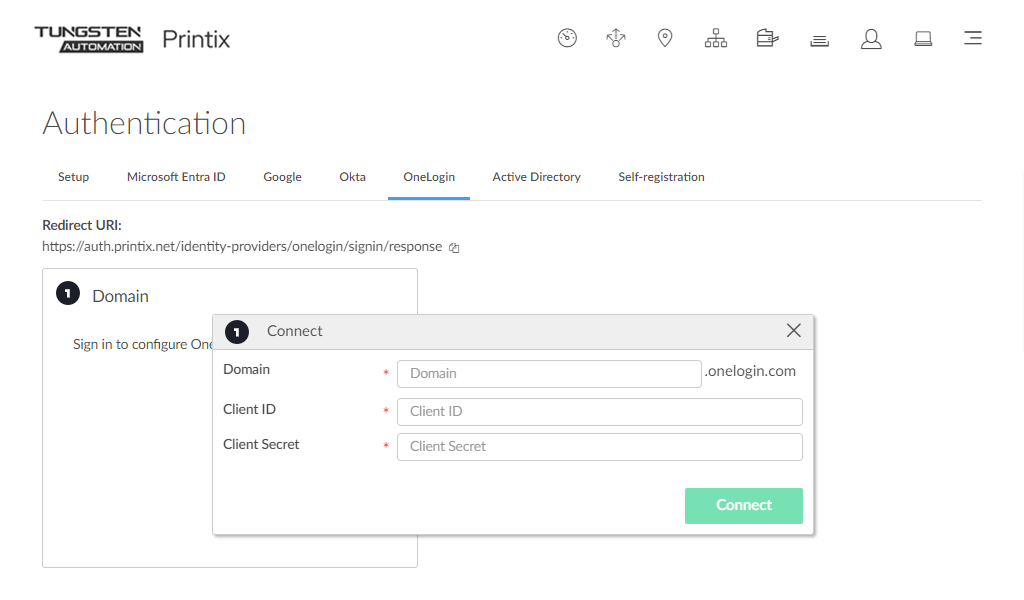
- In Domain, enter your OneLogin domain (acme.onelogin.com).
- In Client ID, paste the value you copied in step 13.
- In Client Secret, paste the value you copied in step 14.
- Select Connect.
How to add multiple domains
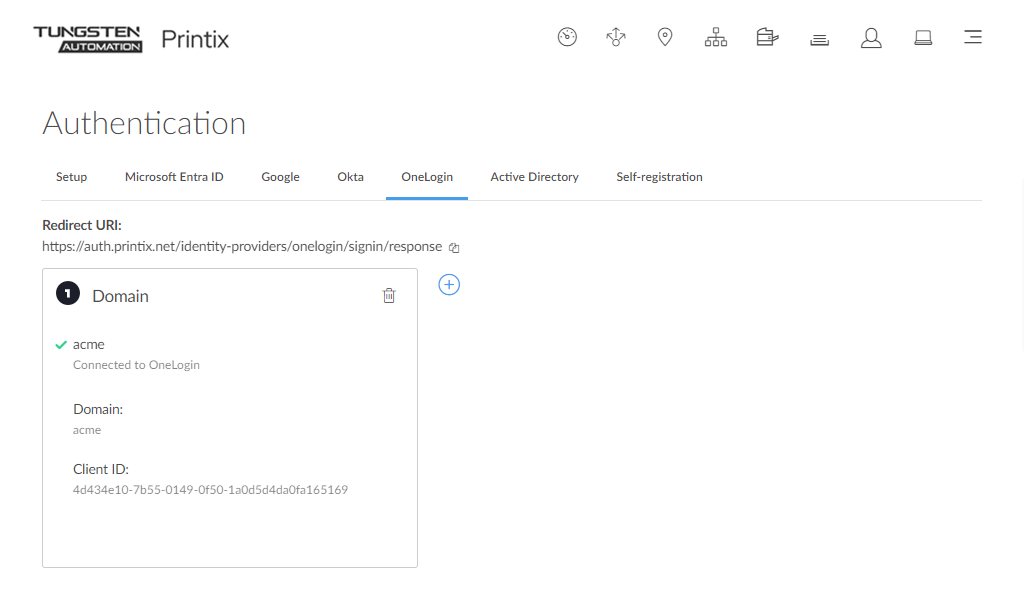
-
Select
Add
 to add another OneLogin domain.