Administrator Help
 › How to › How to deploy Printix App for Android with Microsoft Endpoint Manager
How to deploy
Printix App
for Android with Microsoft Endpoint Manager
-
Open a new browser window and sign in to
Microsoft Endpoint Manager admin center (endpoint.microsoft.com) using your work account credentials.
-
In the Microsoft Endpoint Manager admin center, select
Apps.
-
On the
Apps | Overview blade, under
By platform, select
Android.
-
On the
Android | Android apps blade, select
Add.
-
In the
Select app type pane, under the
Store app app types, select
Android store app.
-
In the
Add app pane, select
Search the App store.
-
In search, type:
Printix App
-
Select
Printix App
and select
Select.
-
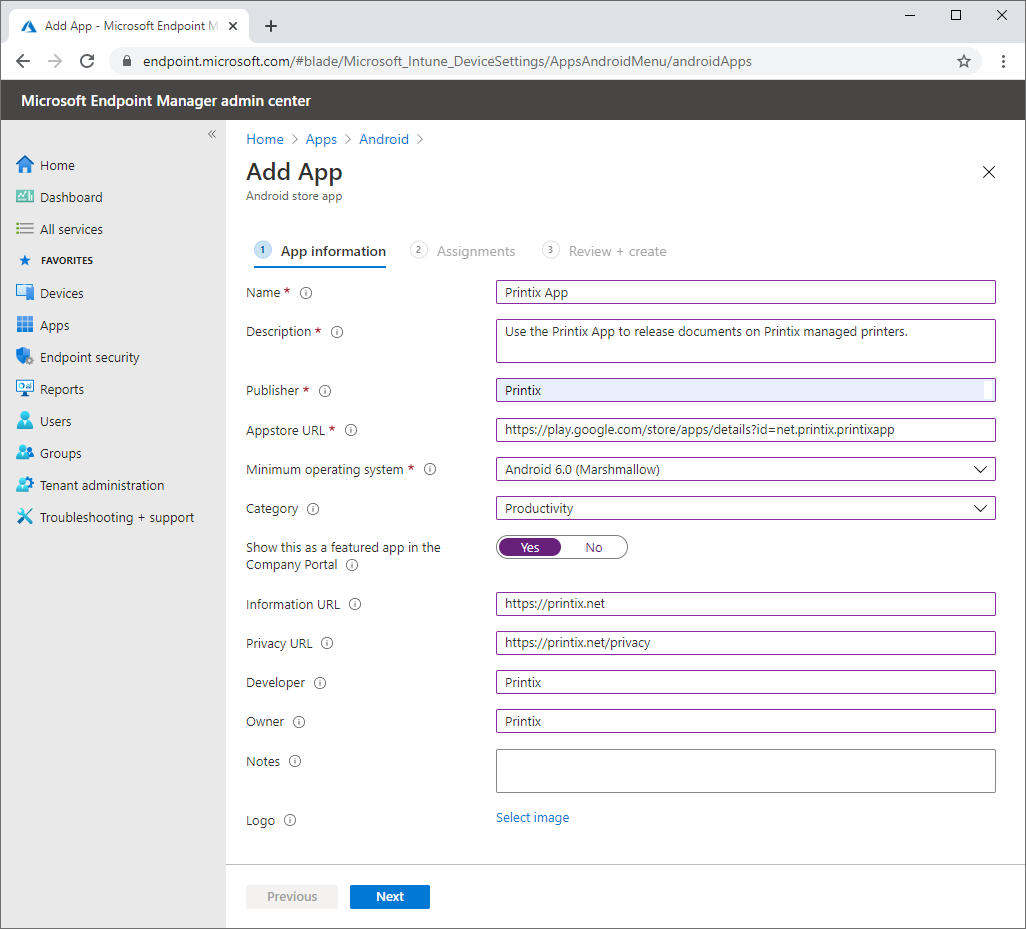
On the
App information page:
- In
Name, type:
Printix App
- In
Description, optionally, type: Use the
Printix App
to release documents on
Printix-managed printers.
- In
Publisher, type:
Printix
- In
Appstore URL, type: https://play.google.com/store/apps/details?id=net.printix.printixapp
- In
Minimum operating system, select
Android 6.0 (Marshmellow).
- In
Category, select
Productivity.
- For
Show this as a featured app in the Company Portal, select
Yes.
- In
Information URL, optionally, type: https://printix.net
- In
Privacy URL, optionally, type: https://printix.net/privacy
- In
Developer, optionally, type:
Printix
- In
Owner, optionally, type:
Printix
- In
Notes, optionally, type any notes you want to associate with this app.
- Optional
Logo. Select
Select image to select, for example, an image with the
Printix
logo.
-
Select
Next.
-
Select the
Required or
Available for enrolled devices.
-
Select
Next to display the
Review + create page.
-
Review the values and settings you entered.
-
When you are done, select
Create to add
Printix App
to Microsoft Endpoint Manager.
×
![]()