
Enable USB printing
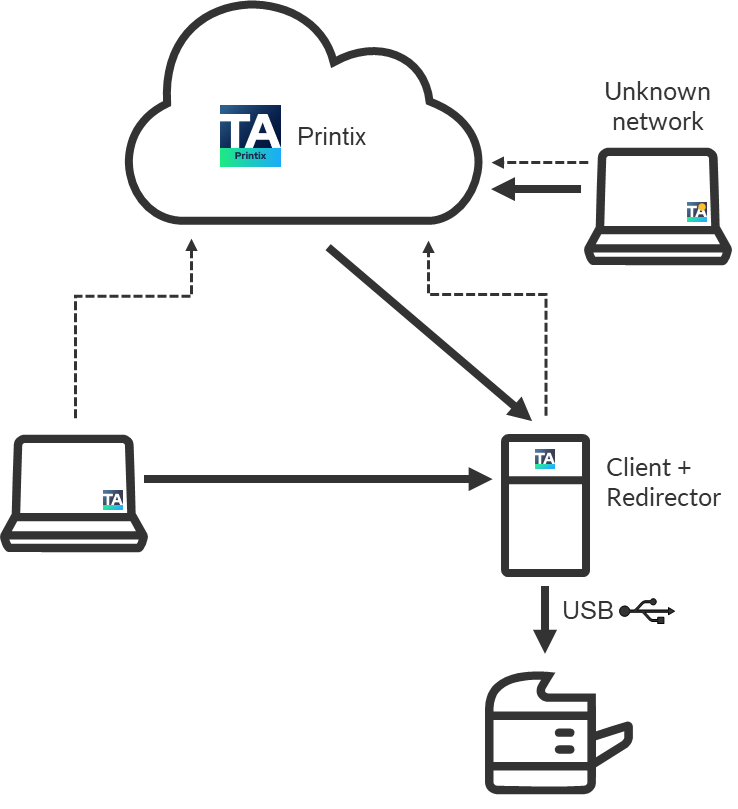
Use Printix Redirector (Printix Hybrid Cloud Print Enabler) to enable printing to a locally attached USB printer.
Printing to the USB printer only works when the connected computer is online.
- Install Printix Client and Printix Redirector on the (desktop) computer that has the locally attached USB printer.
-
In Printix Administrator, open the Printers
 page.
page.
-
Select
Add
 .
.
- Select the Network of the computer that has the USB printer attached and Printix Redirector installed.
-
In
Printer address, type:
\\{computername}\{printqueuename}.
-
The {computername} should be that of the computer running Printix Redirector.
Example: mycomputer
-
The {printqueuename} should be the Printer name of the USB print queue. Do NOT use a possible Share name.
-
See also: How to see which print queues and ports are installed.
-
-
Select
Add.
-
If the printer does not appear in Printix Administrator, look for it on the Unregistered printers page.
-
By default, the print name is set to the name of the driver used by the USB print queue.
-
The default print queue is set to the name of the driver used by the USB print queue. If no print queue exists, create a print queue.
-
- Optionally, select Via the cloud to allow users to print to the USB printer even though they are not on the network same as the printer.