
How to enable printing via the cloud
Typically, for printing to function, a user's computer must be on the same company network as the printer. By enabling printing via the cloud, users can print to this printer while they are on another company network.
- Open the Print queue properties page.
-
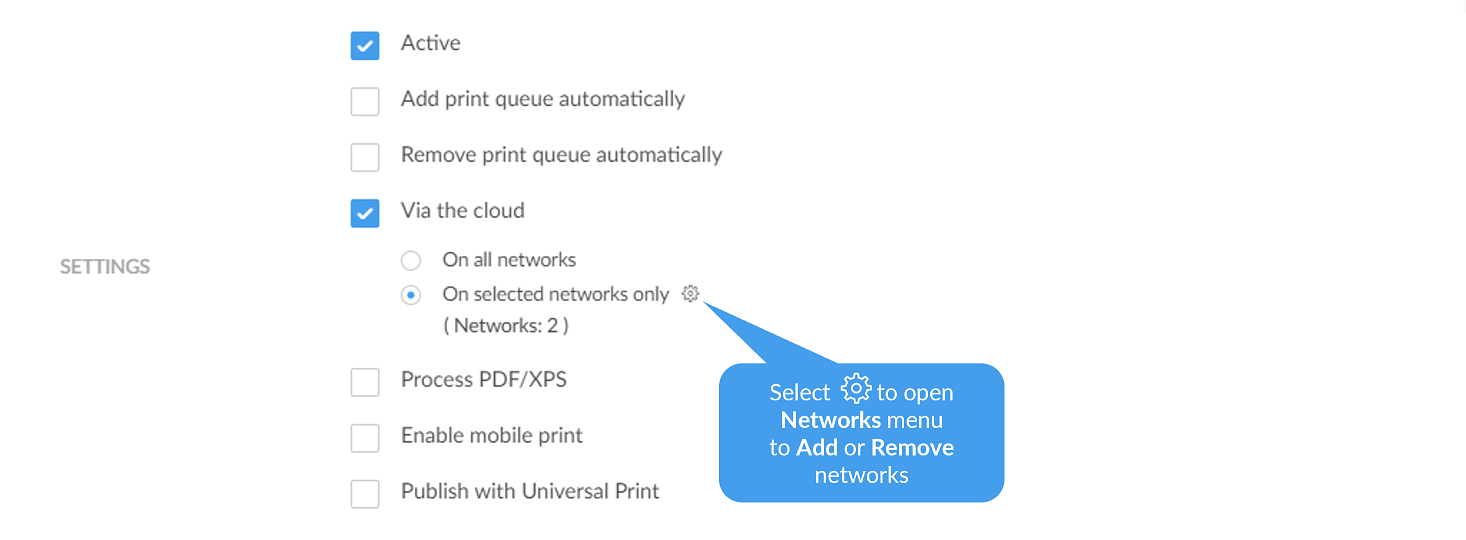
Select
Via the cloud.
-
Can only be modified if you have the role: System manager.
-
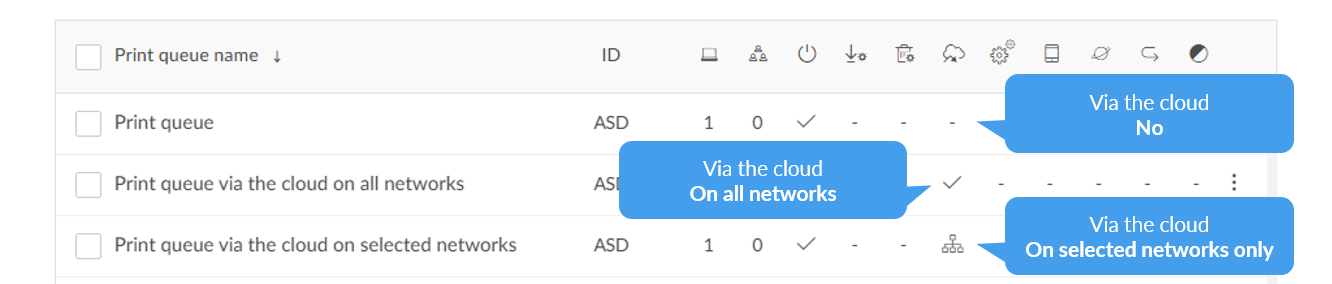
- By default, On all networks is selected and the print queue will be available via the cloud to all computers on all networks, including computers on unknown networks. Select On selected networks only if the print queue is to be available via the cloud on the selected networks only. In a zero trust networks environment, use this to make the site's printers (on their own printer network) available to only the computers on the site's computer network.
-
Select
Save.
See also: Networks
Users whose computer is on an unknown network, perhaps while they are working at home or traveling, can print directly to the printer. A user who attempts to release a document while the computer is on an unknown network will see the message: "Unable to perform action while Printix Client is on an unknown network."
Modify Via the cloud for multiple print queues
If you are modifying multiple print queues, the following rules apply:
-
If you select Via the cloud, all selected print queues will have Via the cloud selected and On all networks selected.
-
If you clear Via the cloud, all selected print queues will have Via the cloud cleared.
-
If you select On all networks, all selected print queues that have Via the cloud selected will have On all networks selected.
-
If you select On selected networks only, all selected print queues that have Via the cloud selected will have On selected networks only selected.
-
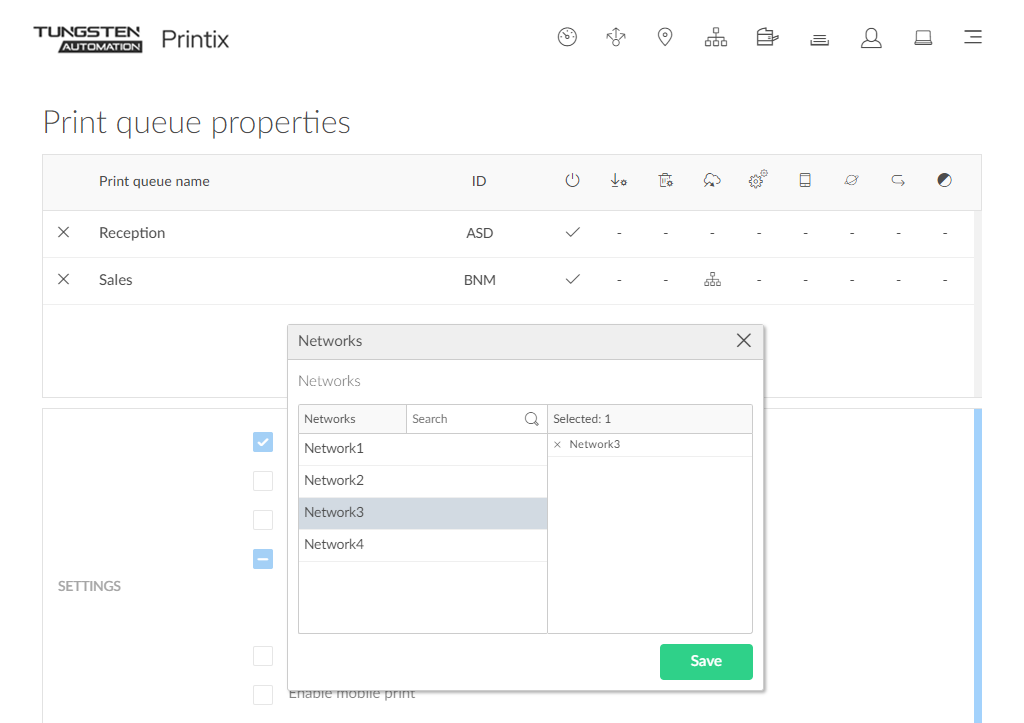
If you select Networks setup
 to open
Networks
to open
Networks
 menu, all selected print
queues will have the selected networks when you select
Save.
menu, all selected print
queues will have the selected networks when you select
Save.
-
Add to network: In the left pane, select network (all networks are shown).
-
Remove from network: In the right pane, select X to remove (only networks where the selected print queues are added are shown).
-
-
A print queue is always available on the network of the corresponding printer.
How it works
Printing is achieved through Printix Cloud and a Printix Client computer on the printer's network. At least one of the Printix Client computers on the printer's network should have permanent network access. The document remains secure during the transfer over the Internet as the document itself and the communication are both encrypted.
If the release printer support PDF printing, the document is sent to the printer. If the release printer does not support PDF printing, then, if needed, a print queue is added automatically, so the document can be processed using a matching print driver. Adding the print queue on the computer may take 1-5 minutes depending on the print driver. During this time, the Printix App will show the state "Working on it", before transitioning to "Printing" and then "Printed". The print queue is kept after printing, so it does not have to be added again when subsequent Print Anywhere documents are released to this printer.
How to check if the printer supports PDF
-
Open the Printers
 page.
page.
-
Select
 and
Info to see information about the printer.
and
Info to see information about the printer.
- On the Printer Info page, the Feature section shows PDF if PDF printing is supported.