
How to scan NFC tag
-
Open the Printix App on your phone or tablet.
-
Android

Most Android phones support NFC.
-
iOS

Apple iPhone 7 and above with iOS 11 or higher can be used to scan NFC tag.
-
-
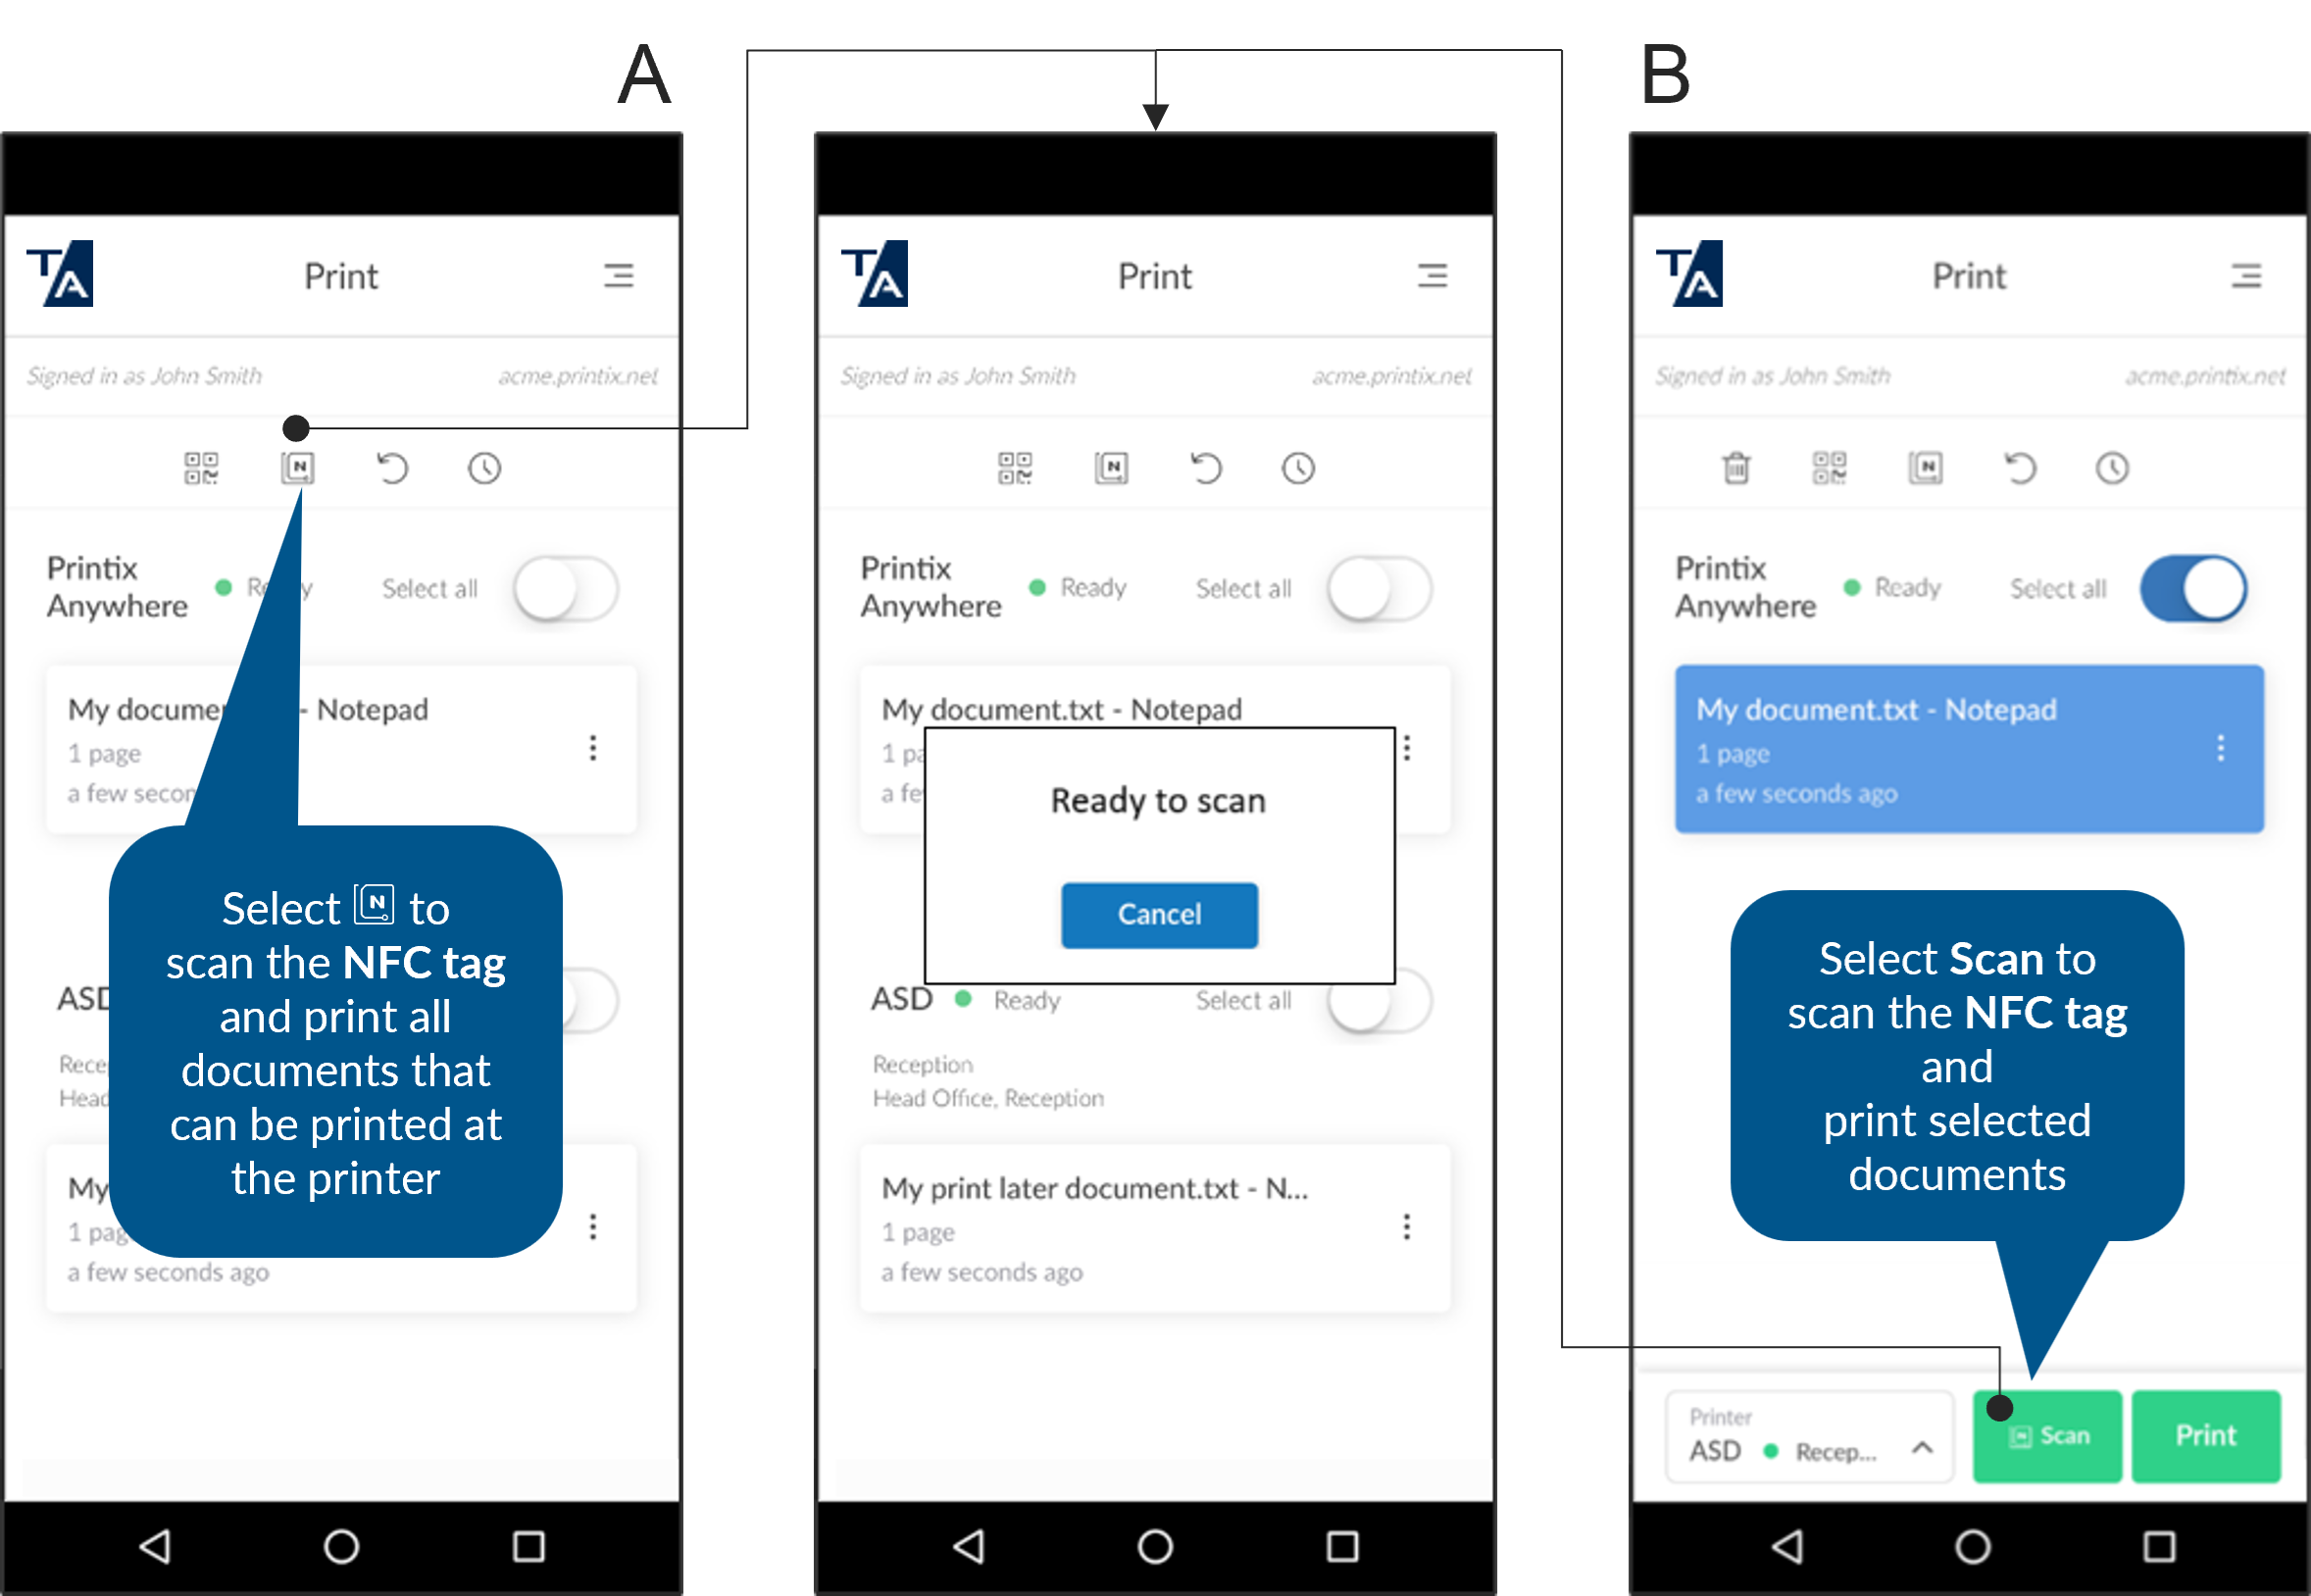
To print all matching documents (Print Anywhere and Print Later), select the NFC tag
 icon at the top of the page.
To print selected documents (Print Anywhere or Print Later) you can A) Select the NFC tag
icon at the top of the page or,
B) Select
Scan at the bottom of the page.
-
Phone shows:
Ready to scan.
Hold the phone close to the NFC tag to scan this.
-
For optimal scanning, the distance to the NFC tag should be less than 4 cm.
-
The phone's NFC detection area depends on the mark and model, and is typically on the backside near the top of the phone.
-
The message Invalid NFC tag will appear if the NFC tag is not registered with a printer.
-
The message Document is not for this printer will appear if the scanned NFC tag does not match the selected Print Later documents. Select Close.
-
-
If multiple print queues exist for this printer, you may be prompted to select one. You are not prompted if only one
of these print queues is marked as favorite
 .
.
Documents will start to print.
Why does Android phone show: New tag collected?
The message
"New tag collected" may appear if an Android
![]() phone is held near an NFC tag
without the Printix App
Scan button or NFC tag
phone is held near an NFC tag
without the Printix App
Scan button or NFC tag
![]() icon first being selected. Ignore the message by selecting
Back and proceed to select
Scan or the NFC tag
icon first being selected. Ignore the message by selecting
Back and proceed to select
Scan or the NFC tag
![]() icon.
icon.
How to control available printer ID methods
- Open the Printix App on your phone or tablet.
-
Select
Menu
 in the top right corner.
- Select Printer ID method.
-
Select the methods you want to be available:
-
QR code

-
NFC tag
Not available if the phone is not NFC-enabled.
-
- Select OK.