
How to set the default printer
With Printix, you can set the default printer as follows:
See also:
Set default printer for the members of a group
This is useful if you have, for example, a laboratory or classroom with a group of computers and you want to set a default printer for those computers.
- Open the Print queue properties page.
-
Select the
Groups
 tab.
tab.
Only available if groups (Microsoft Entra or Google) are enabled.
-
For the group in question:
-
Select Exclusive access if you want to give the users in the group exclusive access to the print queue. Does not apply to computers in the group.
-
Select Add print queue automatically if you want the print queue to be added automatically to the computer if the computer is a member of the group, when a user in that group signs in.
-
Select Set as default printer if you want the print queue to become the default printer for the users and computers in the group.
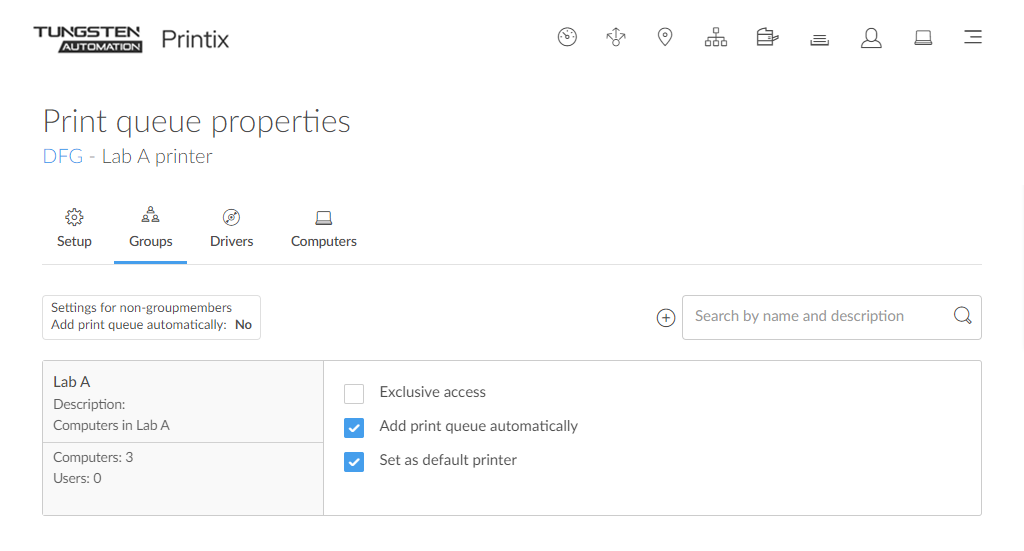
If Set as default printer is selected for multiple print queues, it is random which one is set as default. The Printix Client overrides the user's selection of default printer every time the Printix Service is started and or receives updates to its list of printers and their configuration.
-
Remotely set default printer on a selected computer
This is done just once, and the user can subsequently change the default printer on the computer.
-
On the
Computer properties page, select the
Print
queues
 tab.
tab.
-
To set a print queue as default, select
 and
Set as default printer.
and
Set as default printer.
-
Select
Confirm.
-
The default print queue will be set once for all users signed in on the computer.
-
The task is pending for 72 hours.
-
The default print queue is set for: Printix Anywhere print queues, print queues that have Via the cloud selected, and print queues pointing to a printer that is on the same network as the computer. The command has no effect if the computer is not on the same network as the printer. The command is not available if the print queue is not managed by Printix.
-
How a user can set default printer on Windows
By default, Windows will manage the default printer.
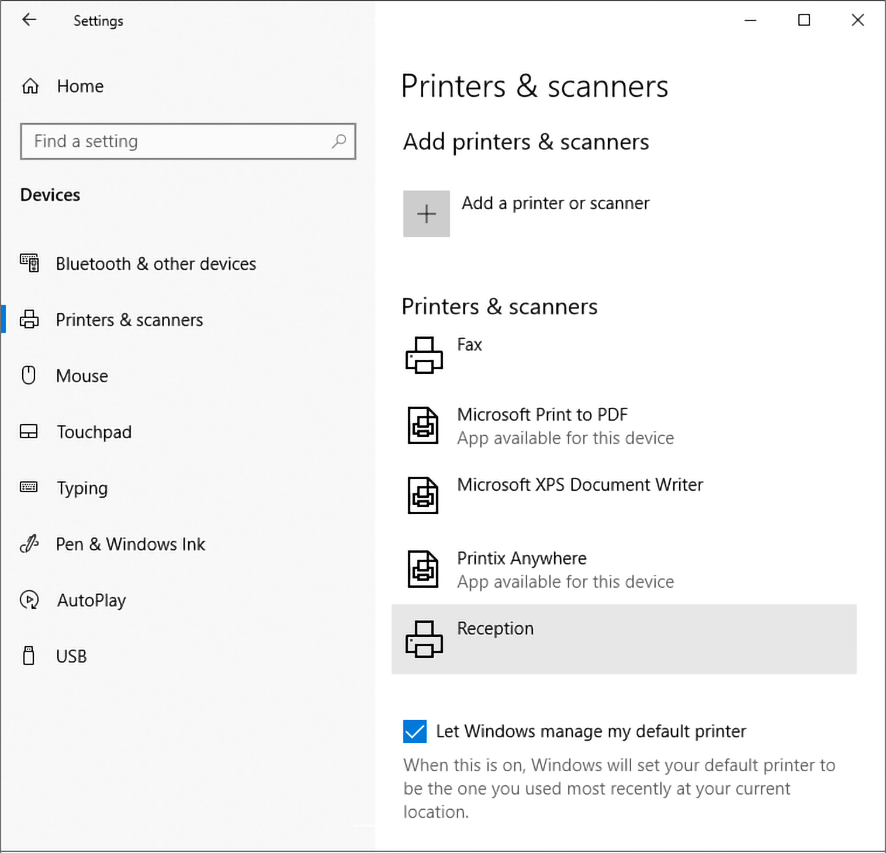
If you set the default printer with Printix, Windows will stop managing the default printer on the computer in question, that is, "Let Windows manage my default printer" becomes cleared in the "Printers & scanners" dialog box.
-
When Windows is not managing default printers, the user can set the default printer manually.
-
Alternatively, set it from the Control panel.
-
The check box "Let Windows manage my default printer" can also be set from the Windows Registry.
Set manually
-
Press
Windows+I.
The Settings window appears.
- Select Devices (or Bluetooth & devices on Windows 11).
- Select Printers & scanners.
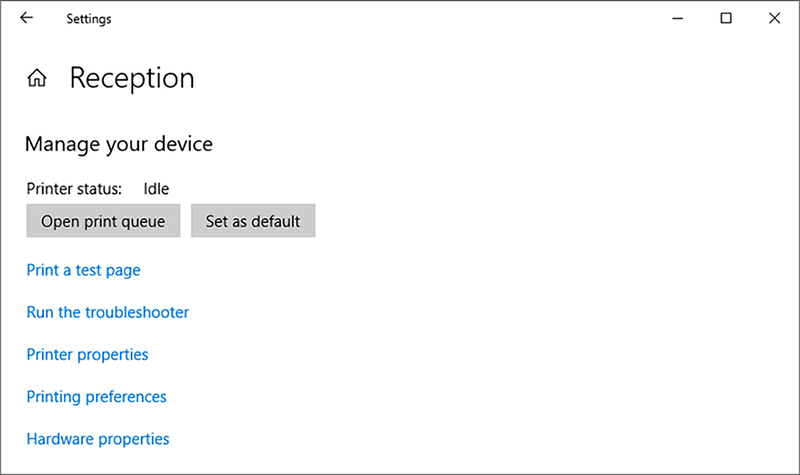
- Select the printer and select Manage.
- Select Set as default.
Set from the Control panel
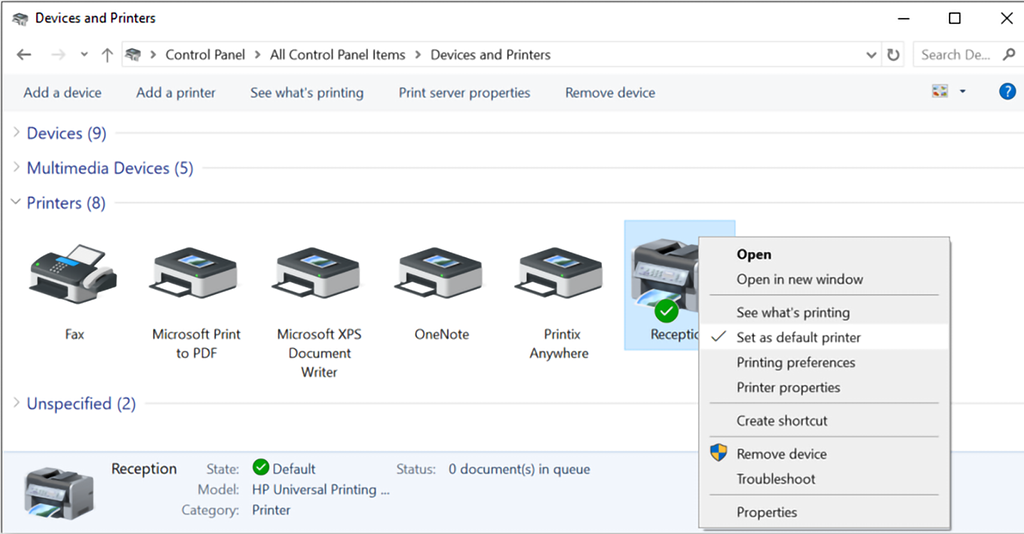
- Open the Control Panel and select Devices and Printers.
- Right-click the printer and select Set as default printer.
Set from the Windows Registry
-
Press
Windows+R.
The Run dialog box appears.
-
Type
regedit, then select
OK.
Select Yes if prompted.
The Registry Editor appears.
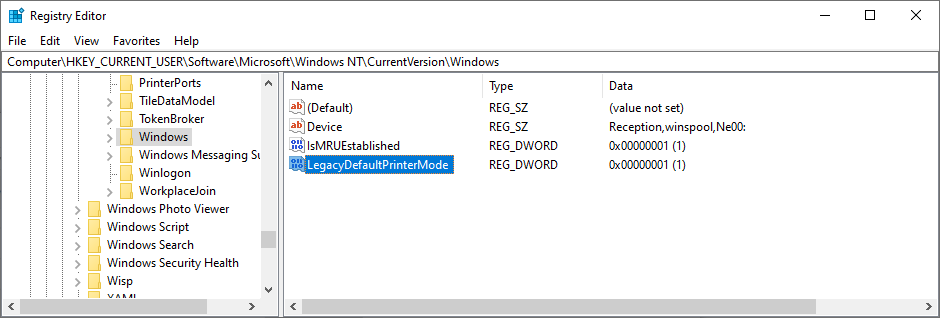
- Browse to HKEY_CURRENT_USER\SOFTWARE\Microsoft\Windows NT\CurrentVersion\Windows.
-
The value named
LegacyDefaultPrinterMode can have these values:
-
0 - Let Windows manage my default printer is selected.
-
1 - Let Windows manage my default printer is cleared.
-
How a user can set default printer on Mac
-
Select
Apple menu
 > System
Settings, then select
Printers & Scanners.
> System
Settings, then select
Printers & Scanners.
-
Select the menu labeled
Default Printer and select the preferred printer.
If you select Last Printer Used, the computer remembers the printer you used last at your current network location.
How a user can set default printer on macOS version 12 or lower
-
Select
Apple menu
> System
Preferences, then select
Printers & Scanners.
-
Select the menu labeled
Default Printer and select the preferred printer.
If you select Last printer used, the computer remembers the printer you used last at your current network location.