
Getting started
Follow these steps if you use Printix for the first time:
- Visit printix.net and select Free trial.
- Enter your Work email.
- Enter your Full name.
- Enter a Company name.
- Select Number of employees, then select the correct range from the list.
- Select a Country.
- Optionally, change I am starting this trial as to Service provider.
-
Enter a
Subdomain.
The text is used in your Printix web address (also known as your Printix Home), so you can use only: A-z, 0-9, -.
-
Select
Start trial.
The page displays Domain reserved if the Printix Home is already in use. If that happens, change it and select Start trial again.
You receive an email with the subject Welcome to Printix.
-
Open the email and select
Get started.
If you do not see the email within a few minutes, check your spam/junk mail folder. The link in the email can only be used once for activation, and it must happen within 72 hours.
- Complete the steps presented by the Setup assistant.
Setup assistant
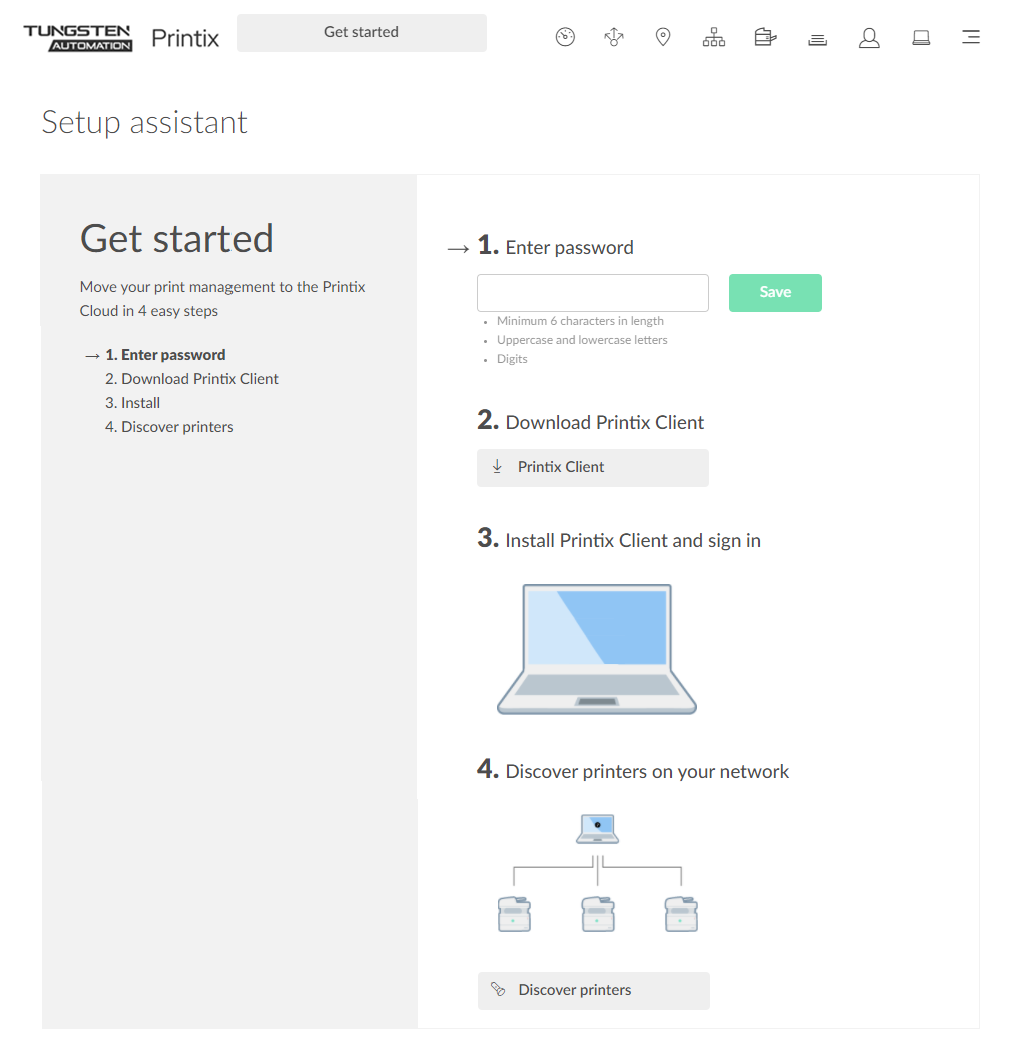
The Setup assistant helps you get started with Printix and move your print management to the Printix Cloud.
-
Enter a password, then select
Save.
The password is required for signing in to the Printix Client.
-
The password must be minimum 6 characters in length and contain uppercase letters, lowercase letters, and digits.
-
This step is skipped if you use an existing Printix account.
-
-
Download the
Printix Client installer file on a Windows or Mac
computer.
On a Windows computer, select the appropriate installer file for x64 or ARM64 architecture.
-
Open and run the downloaded file to
install the
Printix Client.
The installation takes a couple of minutes.
- If you are not prompted to sign in, open the Printix Client menu, then select Sign in.
-
On the sign-in page, enter your email and password.
-
If you do not remember your password, select Forgot password?
-
If you have issues while signing in to the Printix Client, see Sign-in issues.
The web administrator dashboard appears.
-
-
Select
Discover printers and wait a couple of minutes while the
Printix Client
discovers your printers. Select
Close.
-
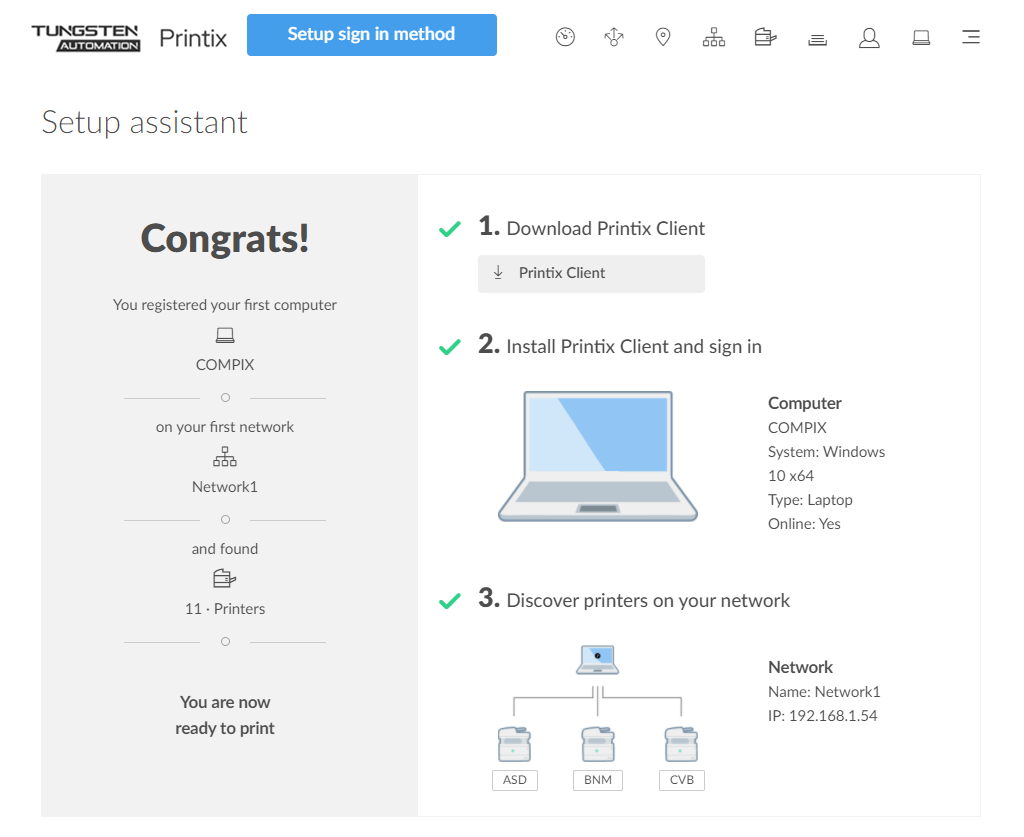
The Printix Client attempts to discover your printers and securely transfer necessary information to the Printix Cloud.
-
If no printers were found, select Add printer
 on the
Printers page and enter the IP address (such as 192.168.1.10) or hostname of one
printer.
on the
Printers page and enter the IP address (such as 192.168.1.10) or hostname of one
printer.
-
If a printer fails to register, it appears on the Unregistered printers page.
-
-
Additionally, Printix Anywhere is installed.
-
Print queues are converted and their name is extended with a three-letter printer ID to make it easy to search for and identify printers.
If no printers were discovered, select Learn more to read about printer registration issues.
To further guide you to a successful trial, you are presented with three other buttons:
-
-
Select
Setup sign in method to open the
Setup tab on the
Authentication page.
From here, you can easily add and enable sign-in methods, such as: Sign in with Microsoft or Sign in with Google.
- Select Implementation to open the Implementation assistant, which simplifies and reduces the steps needed to implement Printix.
-
Select
Subscription to open the
Subscription page, enter billing information, and add a credit card to start
subscription after trial end.
This is relevant for direct customers only, because customers onboarded by our partners are billed through the distributor/partner in question.
If you need your trial period extended, contact Product Support.
Start printing
Having installed Printix Client, you can now print to the Printix-managed printers and examine the many features that make office printing convenient, secure, and easy to manage. But first, let us examine how you can print as usual.
- On your computer, open the item to print.
-
On the
File menu, select
Print.
You can notice that nothing has changed, except for the three letters at the end of the printer name (ASD, BNM), which indicates that these printers are now managed by Printix. Also, apart from the Printix Anywhere printer, you have the exact same printers available to you as you did before the installation.
- Select a Printix printer, then select Print.
Optional customizations
-
Subscription email receiver
During the 1-month trial, email reminders are sent when 15, 5, and 1 days remain. These emails are, by default, sent to the email address of the user (you) who signed up for the Printix Cloud Print Management Service. On the Subscription page, you can change who receives subscription emails and future invoices. You can add a credit card at any time to suppress the email reminders. You will still get the remaining time of your 1-month trial for free.
-
Email message signature
On the Settings page, you can change the signature to include contact details for your Help Desk. By default, this is populated with the name and email address of the user (you) who signed up for the Printix Cloud Print Management Service.
-
Accept Printix for all users
If users sign in with Microsoft, you can grant permission to read users' profiles without prompting the individuals in your organization. This provides a much smoother deployment. You can also choose to remove the Sign in with email option.