
Printers
Lists the printers.
-
Select a printer's Printer name, ID, or select More
 and
Modify to open the
Printer properties page.
and
Modify to open the
Printer properties page.
-
Select the printer's number of Queues (such as 2) or select More
and
Queues to toggle the view of print queues.
-
Select check boxes of printers and select Modify at the bottom of the screen. Select the check box at the top of the list to select all printers.
-
Select Refresh
 to refresh the list.
-
Select More
and
Info to see information about the printer:
-
ID, Name, Queues, Model, and Location (if any).
-
Network: The network the printer is on.
-
Printer address: Select it to open the printer's web page.
-
Features: Color
 printing, 2-sided
 printing, and PDF printing.
-
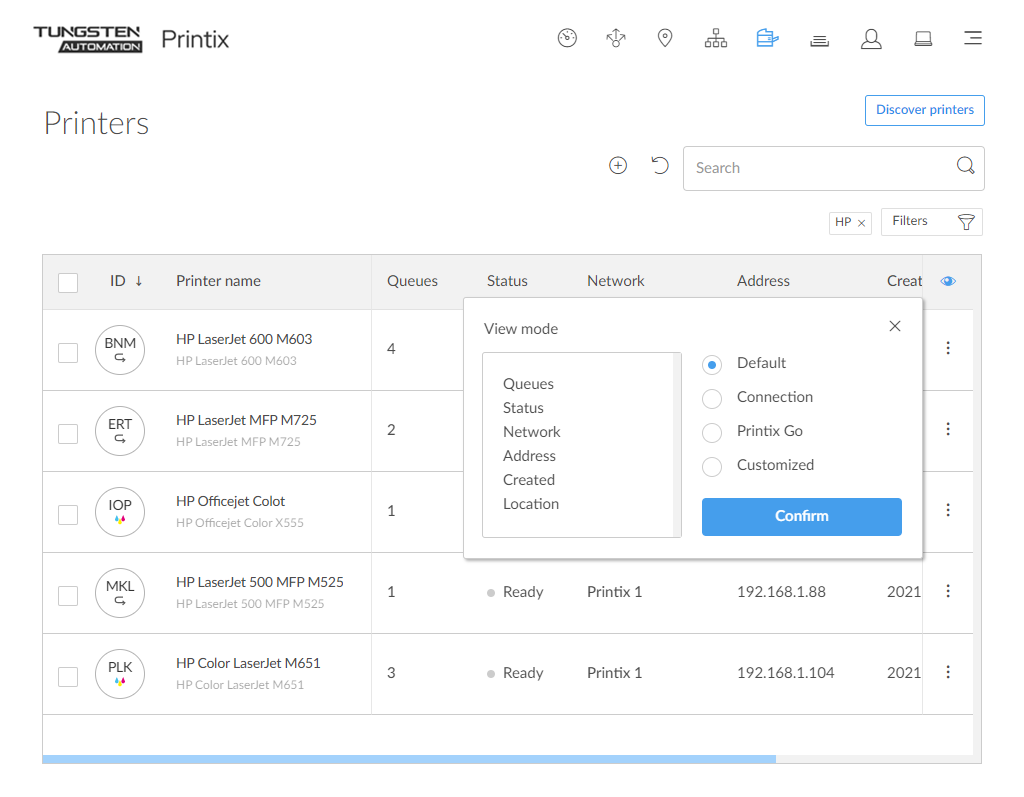
View mode
-
Select the
Eye
 to control what printer information should be displayed.
The ID and Printer name columns are always shown.
-
Default: An overview of printers, their status, and location. Columns:
-
Queues, Status, Network, Address, Created, and Location.
-
-
Connection: Useful if you are using SNMP settings and different protocols. Columns:
-
Status, Network, Address, MAC address, SNMP configuration, Protocol, and Site.
-
-
Printix Go: Useful for managing Printix Go on your printers. Columns:
-
Status, Installation, Vendor, Go version, Capture version, Go configuration, Sign in profile, and Card readers.
-
-
Customized: Build your own, customized view mode with the printer information you select.
-
How to view print queues
-
Select the printer's number of Queues (such as 2) or select More
and
Queues to toggle the view of print queues.
-
Select Print queues
 to open the
Print queues tab to create, modify, or delete print queues.
to open the
Print queues tab to create, modify, or delete print queues.
-
Select a print queue's name (Reception) to open the Print queue properties page.
Do you see print queues you do not know of? See Why are there additional print queues?.
Add printer
-
Select
Add printer
 to add a printer.
Other ways to add printers:
-
Select Discover printers to add printers.
-
Select Unregistered printers to work with printers that failed to register.

-
Search
-
Select
Search
 .
.
-
Enter printer ID, name, location, or address.
The search is not case-sensitive.
Filters
-
Select
Filters.
-
Select Network to filter by this.
-
Select Network type to filter by this.
-
Company (Same as if no filter is selected)
-
-
Select Created to see printers added within the previous 3, 6, 12, or 24 hours.
-
Select Vendors to filter by printer vendor.
-
Select Printers with Go to filter by this.
-
Select Outdated Go version to filter by this and determine which printers needs to have Printix Go updated.
-
Select Go configurations to filter by this.
-
Select Sign in profiles to filter by this.
-
- To remove all filters, select .
Sort by
-
Select a column title to sort by it.
-
Select ID to sort by printer ID.
-
Select Printer name to sort by printer name.
-
Select Created to sort printers by the date they were registered.
-
Select Location to sort by printer location.
-
-
Select the column title again to toggle the sort order:
 and
and

Status
-
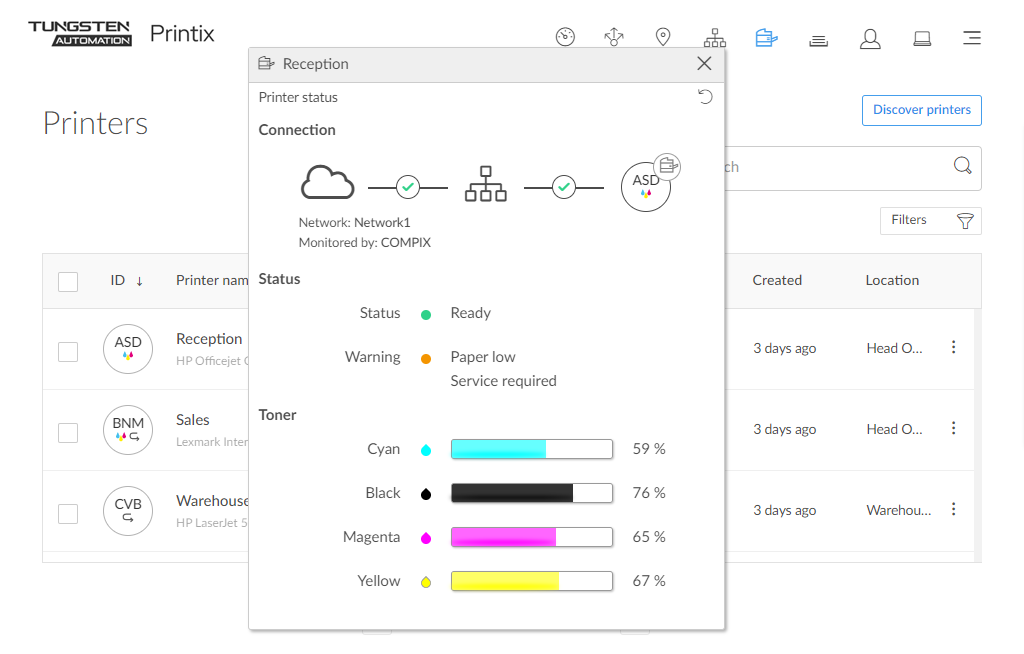
To see status details, select the status icon:
-
 Printer is
not monitored or
not responding: The status text is the last known status of the printer.
Printer is
not monitored or
not responding: The status text is the last known status of the printer.
-
Select Network (Network1) to open the Network properties page.
-
Select Computer (COMPIX) to see the Computer properties page.
-
Select Printer (ASD) icon to see the Printer properties page.
-
See Toner levels in percentage.
Not all printers can report toner levels. See "Printer requirements" in the Tungsten Printix Technical Specifications.
-
-
Optionally, select
Refresh
to see the latest status.
-
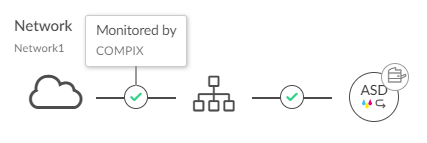
Optionally, select the communication status icon between
Cloud
 and
Network
and
Network
 .
.
-
It displays Monitored by and the name of the computer (COMPIX) that is monitoring the printer (ASD).
-
If no computer is online to monitor the printer, it displays Printer is not monitored.
-
-
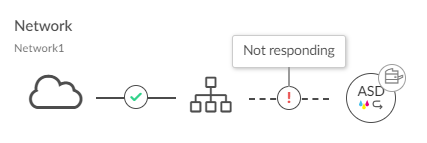
Optionally, select the communication status icon between
Network
and
Printer
 .
.
-
It displays OK if communication is working.
-
It displays Not responding if the printer is disconnected or powered off.
-
It displays Missing printer information if the SNMP configuration is wrong.
-
It displays This is not a printer if the entered address does not point to a printer.
-
Delete printer
-
To delete a printer, select More
and
Delete.
-
Before deleting a Ricoh printer, Printix Go must be uninstalled. Otherwise, you might see an error message when you next use a Print or Capture workflow on the printer.
-
-
Select check boxes of printers and select Delete
 .
.
-
Select the check box at the top of the list to select all printers.
When you delete a printer, the corresponding Printix print queues on users' computers will also be deleted by the Printix Client.