
How to create a workflow for Connector
-
Select
Menu
 > Settings
 .
.
-
Select the
Capture
workflows
 tab.
tab.
- Select Create workflow.
-
In the
Settings section:
-
In Workflow name, enter the name of the workflow.
-
Ensure that the Active checkbox is not selected.
-
Ensure that All users can use this workflow is selected.
-
Select Bypass output document generation to deliver the captured images to a configured Connector without processing or modification. This option is cleared by default.
-
-
In the
Source section:
-
Select Printer to scan pages with a printer using Printix Go and Printix Capture.
-
Make your selection for the printer scan settings: Orientation, Paper size, Color, Resolution, and 2-sided.
-
-
Select Mobile to scan pages with a phone or tablet using Printix App version 3.0.1 or newer on Android or iOS/iPadOS.
-
-
In the
Image processing section:
If Source is Mobile, the image processing is controlled on your phone or tablet.
-
Optionally, select Delete blank pages to have blank pages deleted.
-
Optionally, select Deskew to have captured images deskewed automatically.
-
Optionally, select Crop to have captured images cropped automatically.
-
In Rotation, select a rotation. The rotation is performed before any OCR.
While the "Bypass output document generation" option is selected, the "Image processing" section is unavailable.
-
-
In the
Output document section, select a
File type:
-
Select PDF - Searchable to generate the output document in a searchable PDF format.
-
In Image quality, select the image quality.
-
In PDF compatibility, select the PDF compatibility.
-
In Optimize OCR process for, select your preference for accuracy and speed.
-
In Language for OCR use, select Select language, then select the languages for OCR use.
-
-
Select PDF - Image only to generate the output document in an image-only PDF format.
-
In Image quality, select the image quality.
-
In PDF compatibility, select the PDF compatibility.
-
-
Select Microsoft Word to generate the output document in DOCX format.
-
In Image quality, select the image quality.
-
In Optimize OCR process for, select your preference for accuracy and speed.
-
In Language for OCR use, select one or more languages.
-
While the "Bypass output document generation" option is selected, the "Output document" section is unavailable.
-
-
In the Metadata section:
-
If you don't want to use metadata for the capture workflow, select Remove to delete the metadata field.
-
In Name, enter a name for the metadata field.
-
In Label, enter a name that you want end-users to see.
-
Optionally, select Required if the metadata must get a non-empty value from end-users to continue the related capture job.
-
In Type, select the type of the metadata field.
-
If you selected Text, select a Validation type that determines what kind of value this metadata field can have.
If you select Date, the date format must be specified.
If you select Custom, a regular expression must be specified in JavaScript format.
-
If you selected Lookup, select Available items, then specify keys and values for the metadata field.
After naming a key, an option to add another key appears. Maximum 1000 rows can be listed.
-
Select Import to import items from a .CSV file.
Only the first two columns of the .CSV file are used. The rest of the columns are ignored.
-
Select the Up or Down arrow next to an item to move it up or down in the list.
-
Select Delete next to an item to remove it from the list.
-
Select Save to save the changes and close the dialog box.
-
-
-
In Default value, enter the default value for the metadata field.
If the Type of the metadata field is set to Text, the Default value must match the Validation type. For example, if the Validation type is Number, the Default value can only have numbers. You can select the braces { } to insert variables, such as Workflow name.
If the Type of the metadata field is set to Lookup, you can select one item from the available lookup items.
-
Select Add metadata field to add a new metadata field to the workflow.
Capture workflows for mobile do not yet support metadata fields, so they will not appear in the Printix App.
-
-
In the
Destination section:
-
In Destination profiles, select Connector.
-
In Select destination profile, select among existing connector destination profiles.
-
Select Create destination profile to create a new destination profile.

-
Under the File icon, enter a file name. You can select the braces { } to insert variables, such as Workflow name.
-
Date and time are in UTC (Coordinated Universal Time).
-
-
In Timeout (in minutes), specify the maximum amount of time a workflow can wait for the connector to process the capture job and notify Printix of the result before it is automatically closed with a failed state. Must be between 10 and 120 minutes (2 hours). The default is 10 minutes.
This setting is useful to prevent a workflow from indefinitely waiting for a response.
-
- Select Create.
- Verify that the workflow works as expected.
- Activate the workflow.
- Optionally, make the workflow available to selected groups.
How to create a destination profile for Connector
- Select Create destination profile.
-
Select
Connector as the destination.
If only one destination is available, it is selected automatically.
-
Fill in the form.
-
In Name, enter a name for the destination profile.
The destination profile must be named differently than any existing connector destination profile.
-
In Connector URL, enter the URL of the connector to which Printix has to send the notification of the new documents for the connector to process and deliver them when the workflow selected by the user on the device is configured with this destination profile.
-
In Network, optionally, select the Modify
 icon, then select a network where the connector
is hosted. Leave it blank if the connector is hosted on a public URL.
icon, then select a network where the connector
is hosted. Leave it blank if the connector is hosted on a public URL.
-
In Shared secrets, select Create secret, select the secret type (HMAC SHA-256, HMAC SHA-512, or Connector Token), then select the green check mark to create a new shared secret.
If you want to use a shared secret that was previously copied from a destination profile of a different connector, select Create secret, select the correct secret type (HMAC SHA-256, HMAC SHA-512, or Connector Token) for the copied shared secret, replace the generated value by pasting the copied value from clipboard, then select the green check mark.
-
-
Copy the shared secret value.
The shared secret value is used again later at the connector side.
You can only copy the shared secret at this point. After you leave this page, you are not able to retrieve it. If you leave this page without copying the shared secret, you must repeat the corresponding steps above and create a new connector destination and shared secret.
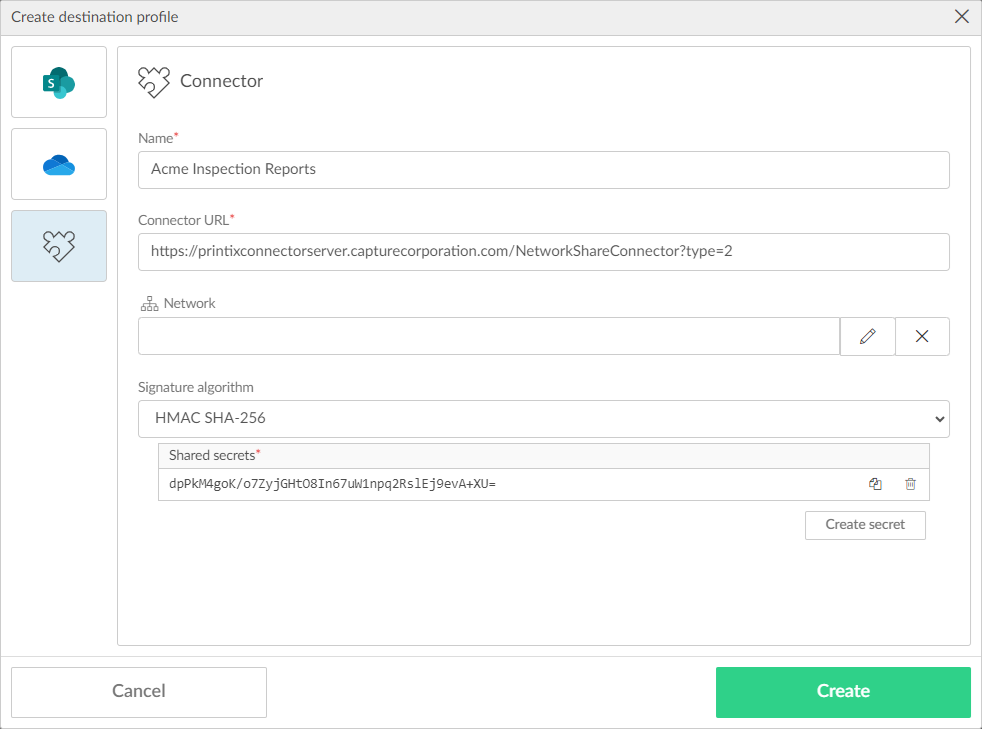
- Select Create.