
How to add printers
Add printers in Printix Administrator
-
If you add the printer by IP address, make sure to give it a static IP address.
-
If the added printer does not appear after a few seconds, look for it on the Unregistered printers page.
-
Open the
Printers
 page.
page.
-
Select
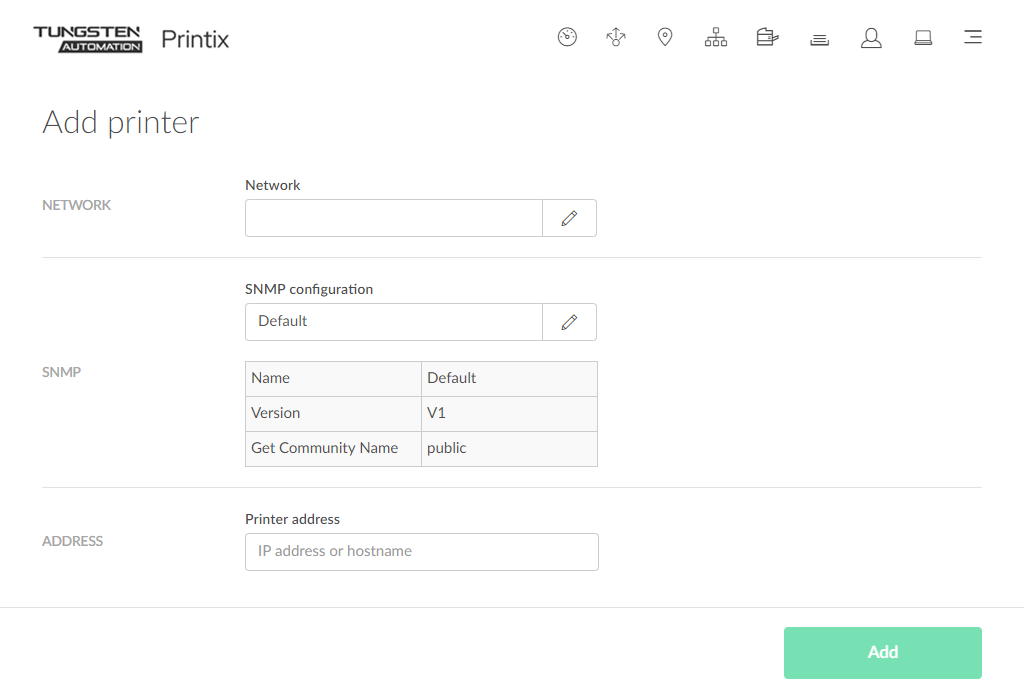
Add printer
 .
.
-
In
Network, select the
Modify
 icon, then select the network where the printer is. Select
Select network.
icon, then select the network where the printer is. Select
Select network.
Site managers can only select networks belonging to managed sites.
-
In
SNMP configuration, optionally, select the
Modify
icon, then select the SNMP configuration that matches the
printer. Select
Select SNMP configuration.
You can only select global SNMP configurations and SNMP configurations assigned to the selected network. If you select a network that does not contain all SNMP profiles of the selected SNMP configuration, the SNMP configuration field is set to the default SNMP configuration.
- In Printer address, enter the IP address (such as 192.168.2.10) or hostname of the printer.
- Select Add.
-
Optionally, open the
Print queue
properties page to perhaps:
-
Change the Print queue name.
-
Select Add print queue automatically.
To create additional print queues for the printer, open the Printer properties page, select the Print queues tab, and select Create print queue.
-
Add printers in Printix Client
Add printers in Printix Client for Windows

- Select the arrow next to the notification area on the task bar.
-
Select the
Printix Client
icon
 .
.
The Printix Client menu appears.
- Select Printers.
-
Select the printers you wish to install.
-
If you see too many printers to choose from, you can do a Search
 .
.
-
The search is not case-sensitive.
-
Administrators can always use all print queues. A star ★ appears after the printer ID if the print queue is not active.
Example: ASD ★ Reception.
-
-
Select
Add.
After installation, the printers are listed as either Installed
 or with
Error
or with
Error
 (installation failed).
-
Select
Finish.
The print driver is downloaded to this installation folder:
-
C:\Windows\System32\DriverStore\FileRepository
-
Add printers in Printix Client for Mac
-
On the menu bar, select the
Printix Client
icon
.
The Printix Client menu appears.
- Select Printers.
-
Select the printers you wish to install.
-
If you see too many printers to choose from, you can do a Search
.
-
The search is not case-sensitive.
-
Administrators can always use all print queues. A star ★ appears after the printer ID if the print queue is not active.
Example: ASD ★ Reception.
-
-
Select
Add.
After installation, the printers are listed as either Installed
or with
Error
(installation failed).
- Select Finish.
How to ensure users only print to printers through Printix
On Windows, you can make a group policy and deploy the PowerShell script to users' computers. Printix Client will still be able to add printers, because it is running under the local system account.
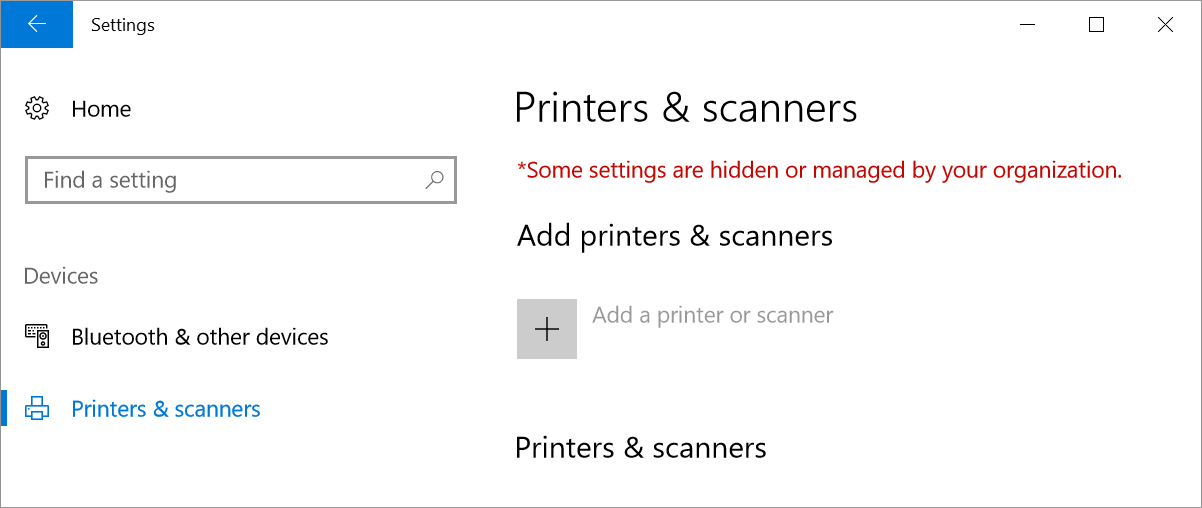
Printers & scanners
Users will not be able to select "Add a printer or scanner" in "Printers & scanners." A note will say: "Some settings are hidden or managed by your organization."
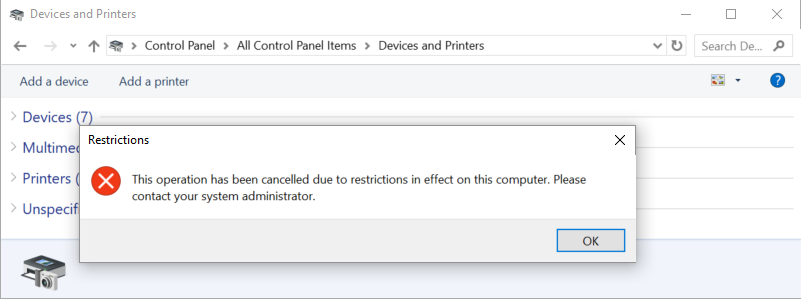
Devices and printers
If users select "Add a printer" in "Devices and printers", they will get a "Restrictions" dialog box saying: "This operation has been cancelled due to restrictions in effect on this computer. Please contact your system administrator."
PowerShell script
$RegKey = "HKCU:\Software\Microsoft\Windows\CurrentVersion\Policies"
If(Test-Path ($RegKey + "\Explorer"))
{
$RegKey = "HKCU:\Software\Microsoft\Windows\CurrentVersion\Policies\Explorer"
  ##Enabled
  New-ItemProperty -path $RegKey -name NoAddPrinter -value 1 -PropertyType DWord -Force
}
else
{
New-Item -path $RegKey -name Explorer
$RegKey = "HKCU:\Software\Microsoft\Windows\CurrentVersion\Policies\Explorer"
  ##Enabled
  New-ItemProperty -path $RegKey -name NoAddPrinter -value 1 -PropertyType DWord
}