
How to enable Okta authentication
Before enabling Okta authentication, it is necessary to configure Okta.
- Open a new browser window and sign in to Okta Console (okta.com) using your Okta administrator account credentials.
- In the Okta Console, select Admin.
- In the Okta Admin console, select Applications, and then Applications.
- Select App Application.
- Select Create New App.
-
In the
Create a New Application Integration dialog box:
-
In Platform, select Web.
-
In Sign in method, select OpenID Connect.
-
-
Select
Create.
The Create OpenID Connect Application pane appears.
- In Application name, type: Printix
- In Application logo, select Browse files and browse to an image file that you want to use as the logo.
-
In
Login redirect URIs, select
+ Add URI.
-
Paste the Redirect URI value you can copy to the clipboard on the Okta tab on the Authentication
 page in
Printix Administrator. Alternatively, type:
https://auth.printix.net/identity-providers/okta/signin/response
page in
Printix Administrator. Alternatively, type:
https://auth.printix.net/identity-providers/okta/signin/response
-
- Leave Logout redirect URIs empty (it is not used). Select Save.
-
On the
General tab in the
Client Credentials section:
-
Copy the Client ID. You need to paste it in Enable Okta authentication.
-
Copy the Client Secret. You need to paste it in Enable Okta authentication.
-
-
On the
General tab in the
General Settings | APPLICATION section:
-
Ensure Authorization Code is selected.
-
-
On the
General tab in the
General Settings | USER CONSENT section:
-
Optionally, clear Require consent.
-
In Terms of Service URI, optionally, type: https://printix.net/terms
-
In Policy URI, optionally, type: https://printix.net/privacy
-
In Logo URI, optionally, type: https://assets.printix.net/img/logo/logo420×120.png
-
- Select Save.
Enable Okta authentication
-
In
Printix Administrator on the
Authentication
page, select the
Okta tab.
-
Select
Connect.
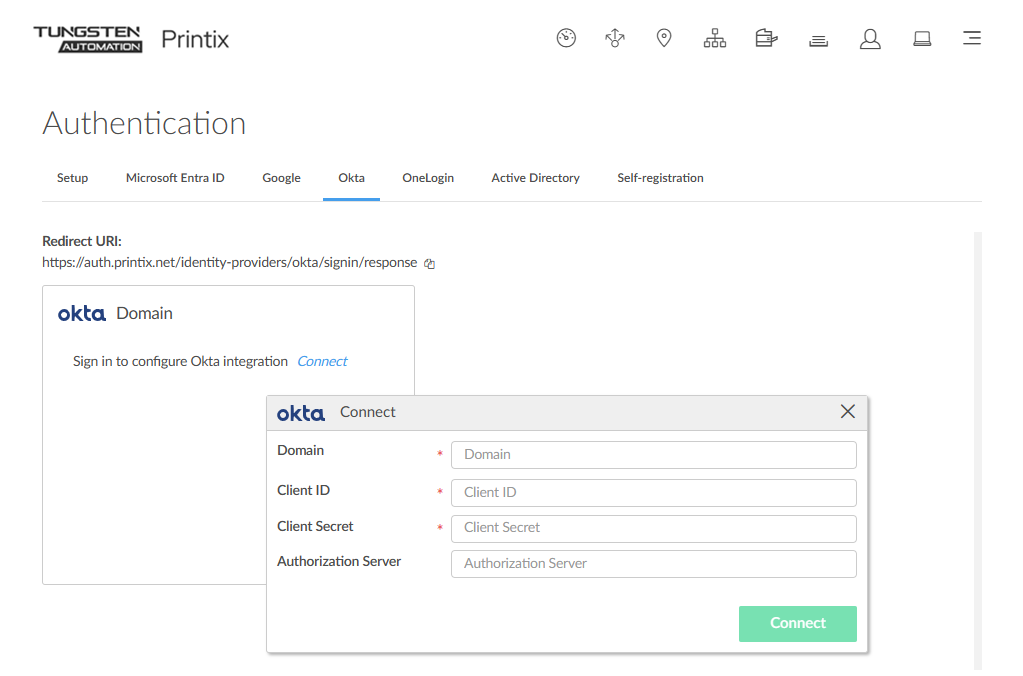
- In Domain, enter your Okta domain (acme.okta.com).
- In Client ID, paste the value you copied in step 12.
- In Client Secret, paste the value you copied in step 12.
- If Okta, for your organization, is set up with an Authorization Server, then enter the value, otherwise, leave it empty (default).
- Select Connect.
Add multiple domains
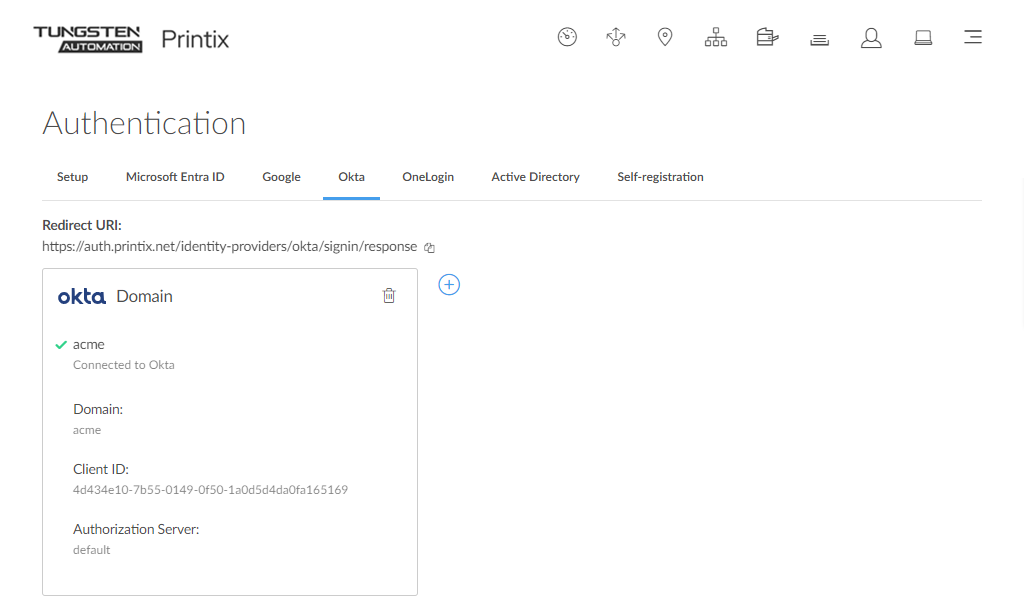
-
Select
Add
 to add another Okta domain.