
How to configure multiple print queues
If you have a lot of printers of the same model and need to make the same configuration change on all of them, you can save time with Distribute print queue configuration. The destination print queues will be set up with same print drivers and print driver configurations as selected for the originating print queue.
If possible, ALWAYS select the print driver name that includes a version number. This is to mitigate that Windows cannot differentiate between versions of the print driver unless the version is reflected in the print driver name. This is particularly important when working with universal print drivers.
Watch this video: Printix Tutorial Series Part 6 - Distributing print driver configurations
-
On the
Print queue properties page, select the
Drivers
 tab.
tab.
-
Select
Distribute print queue configuration.
Only if the print driver is Locked will this also become the print driver in the destination print queue. Otherwise, the destination print queue will be set to Automatic selection of print driver, in which case, Printix will select a print driver based on the printer model.
-
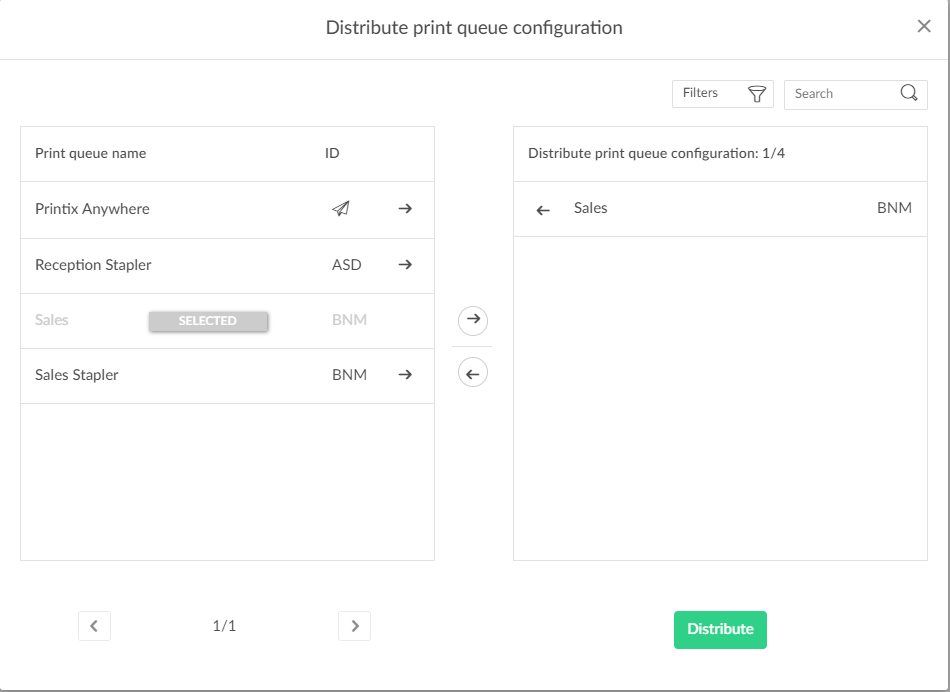
Select the print queues to receive the print queue configuration.
A star ★ appears next to the printer ID if the print queue is not active.
-
Select
Distribute.
To have already installed print queues adopt the new configuration, see How to update print queues on computers.
Search
-
Select
Search
 .
.
-
Enter print queue name or printer ID.
The search is not case-sensitive.
Filters
-
Select
Filters.
-
Select Network to filter by this. The same network as the computer is selected by default.
-
Select Active to filter by this.
-
Select Add print queue automatically to filter by this.
-
Select Remove print queue automatically to filter by this.
-
Select Via the cloud to filter by this.
-
Select Print 2-sided by default to filter by this.
-
Select Print in black by default to filter by this.
-