
Add networks with Printix Configurator
Select Networks in the Printix Configurator to configure networks.
It is best to have the networks in place before printers, because then you can choose networks for the printers.
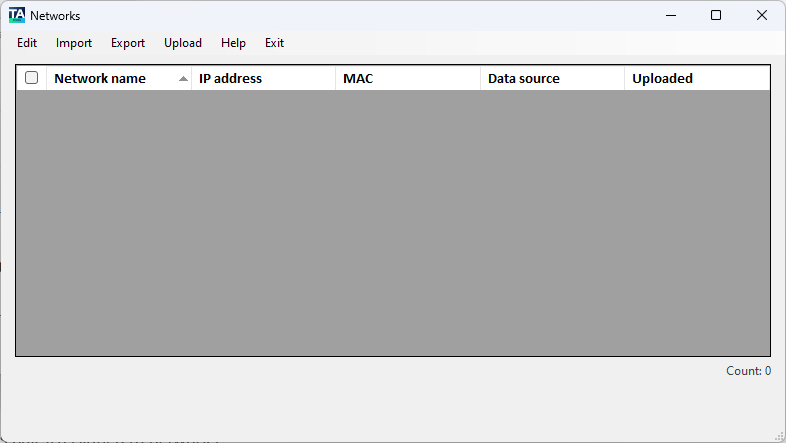
The list contains gateways (IP and MAC address pairs) assigned to networks.
A network can have multiple gateways.
Renaming a network is not possible.
If an IP or a MAC address is updated, that means to add a new gateway to the assigned network (instead of updating the original gateway).
-
In Edit, you can manually add and manage networks.
-
In Import, you can import existing networks from the Printix Cloud or a CSV file.
-
In Export, you can export the list of networks to a CSV file.
-
In Upload, you can upload the networks to the Printix Cloud.
-
Select Help to see a short explanation about the list of networks.
-
Select Exit to close the Networks dialog box and return to the Printix Configurator main window.
Network data
-
Network name
Example: Amsterdam
-
IP address
Example: 192.168.1.1
-
MAC
Example: 54a050e55bc0 or 54:a0:50:e5:5b:c0
-
Data source
Example: Server
-
Uploaded
Example: Yes
The Data source column displays Manual if the data was manually added (), CSV if Import from CSV file was used, and Server if Import from Printix Server was used.
Any invalid component of a network is highlighted in red. You can select Show only invalid items to only display networks with validation errors.
Example of validation errors:
-
Missing information.
-
Multiple networks have the same MAC address.
You can edit a single network by:
-
Clicking a network, then selecting
If only one network has a check mark, that network is edited regardless of which network was clicked.
-
Double-clicking anywhere in the network's row
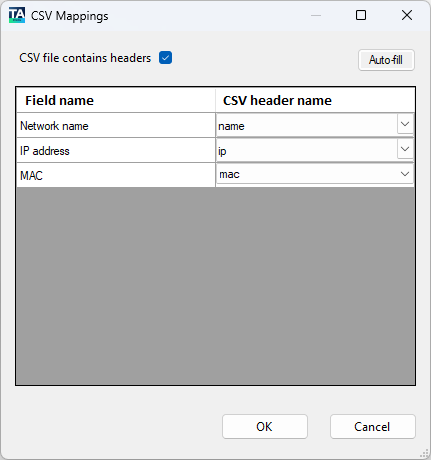
Set up CSV mappings for networks
The CSV file MUST be semi-colon (;) separated. Column headers are optional. Do not put spaces before or after a semi-colon.
-
If the file contains headers, select CSV file contains headers, and for each Field name, select the corresponding CSV header name.
-
If the file has no headers, clear CSV file contains headers, and for each Field name, select a corresponding Column number.
Select Auto-fill to automatically populate the table. After an auto-fill, make sure the correct information is filled in.
Upload networks
After the file content is validated, you can upload the networks to the Printix Cloud.